
The products page is where you can see a list of everything that you sell inside of Ad Sales Genius. Our Product Management interface allows you to easily create, manage, and edit products and product types.
How to Access Products
- Only Administrators and Sales Managers can create and manage Products and Product Types.
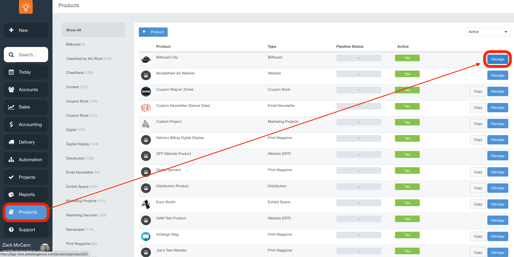
- To access all of your Products select Products from your navigation panel and your products page will display. 🎥 Watch how to access products in the video and images below.
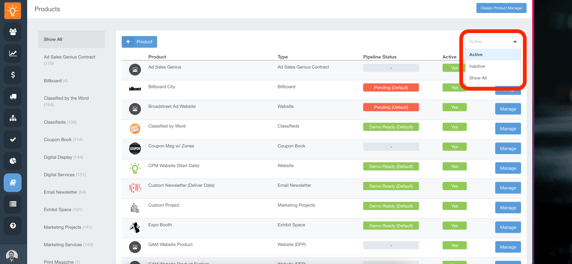
Sort Products
- All Product Types display on the left.
- All active Products can be found in the main area of the page.
- Sort your products by active, inactive and show all.
-
- Active: Defined as anything that you are presently selling. currently working on these and are going to be using them in the future.
- Inactive: Defined as any product that has been deactivated because you no longer plan to sell that product in the future.
- Show all: Defined as a list of all Active and Inactive products.
Deactivate a Product
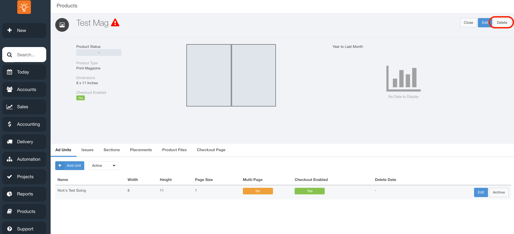
Click on Manage and then edit in the top right. Scroll down and toggle the ACTIVE button to the left to deactivate the product. 🎥 WATCH How to Deactivate a Product
Deactivating a product will not delete any prior orders or any orders that still have yet to be fulfilled. All it will do is it will prevent that product from being sold in the future.
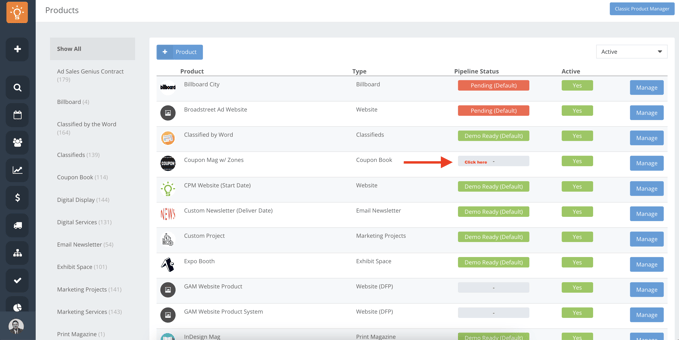
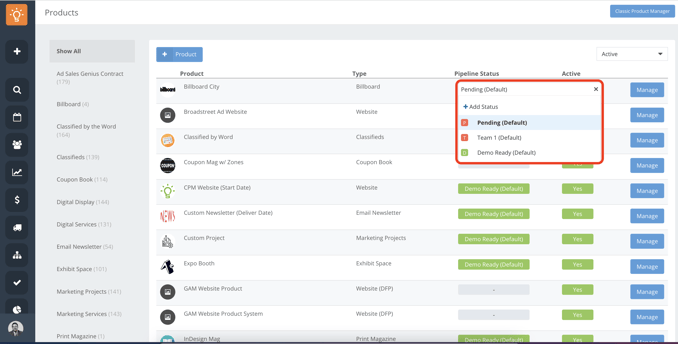
Product Pipeline Status
You can differentiate between different categories of products by assigning a Pipeline Status. There are two ways you can set up a product pipeline status:
- Any Admin can click the pipeline status box then the +add status button will appear. Select +add status.
Incorporate a pipeline status when you are paying commissions, doing reporting and a lot of different criteria that you're able use these. Under reporting you can search for product status in the Product Sale Summary Analysis or your Sales Run Sheet.
🎥 CLICK HERE to Watch how to search for product status on reports
Product Manager
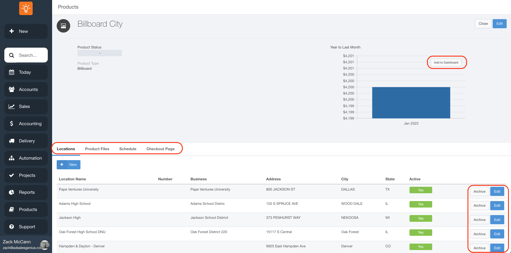
To open the product manager, go to the Products page and select Manage.
From here you can manage your product locations, files, schedule and checkout page. Also, add the product report to your dashboard.
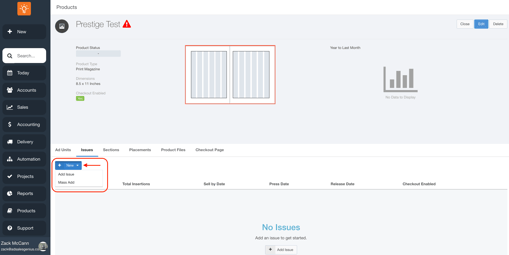
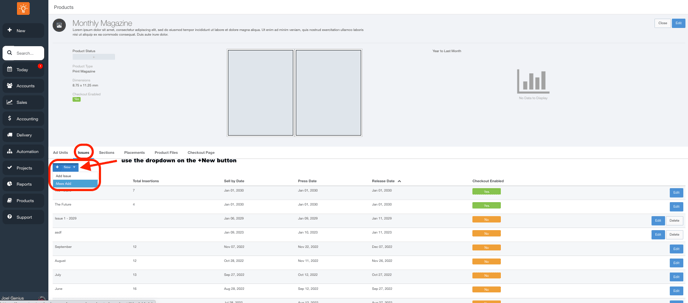
Add multiple issues at a time with the "Mass Add" options.
Delete a product with NO line items:
Product Setup Video
To create a Product, select the +Product button.
Name your product and then either create a product using an existing Product Type or create a new Product Type and select save. 
Creating a Product with an Existing Product Type
- Select an Existing Product Type from the dropdown menu. This will display all features of the Product Type. Features that are included in the Product Type will display a green check mark while features not included will display a gray 'X'.

- Scroll past the Product Type Features List to configure your product settings. If you're using an Issue Based Product Type, set up the Product's dimensions, margins, bleed, and column gutter. Past this section are options to configure the following settings:
- Default Pre-Flight Profile
- Active Status
- Allow Assigning of Multiple Ads
- Enable for Checkout
- Auto-Renewals
- Once your Product Settings are configured hit Save.
Creating a New Product Type
- Select the New Type button.

- Name the Product Type and select the Product type Profile of your choice. The following options and features are available.
- Issue Based: Ideal for publications or newsletters with frequency of 52x a year and less. Each issue is individually created, named and scheduled.
Ex. Magazines, Newspapers, Newsletters, Flat Plan Support- Multi-Page Ads
- Added capabilities of 1 + N the size of an ad size on demand.
- Sections or Zone Support
- Used for ad placement for a specific section in an issue.
- Ad Unit/Size Measurement Unit
- Ex. Inches, Pixels, MM, etc.
- Quantity
- Only select this for products where the billing is based on a quantity such as number of copies, impressions, CPM, CPC, Words.
- Multi-Page Ads

- Time Range / Start and End Date: This feature does not have enforced inventory restrictions. The rep will be able to select a single date this product will run, is due, or be delivered to the client.
- Physical Locations
- Typically used for advertising with a physical location.
- Quantity
- Only select this for products where the billing is based on a quantity such as number of copies, impressions, CPM, CPC, Words.
- Scheduler Calendar
- Add structure and inventory management. Ideal for newsletters where dates are in recurring patterns set.
- Physical Locations
- Issue Based: Ideal for publications or newsletters with frequency of 52x a year and less. Each issue is individually created, named and scheduled.

- Event: All items sold into the product are delivered when the event occurs. This is a non-recurring product and should not be used after the event has been concluded.
- Expo Floor Plan
- Enable this for a fully interactive floor plan tool for selling booths in a visual inventory tracking tool.
- Quantity
- Only select this for products where the billing is based on a quantity such as number of copies, impressions, CPM, CPC, Words.
- Expo Floor Plan

- Delivery Date / Single Day: This feature does not have enforced inventory restrictions. The rep will be able to select a single date this product will run, is due, or be delivered to the client.
- Physical Locations
- Typically used for advertising with a physical location.
- Quantity
- Only select this for products where the billing is based on a quantity such as number of copies, impressions, CPM, CPC, Words.
- Physical Locations

Functional Features:
-
- Mass Add Issues: Under the Products page under Issues tab, you can mass add issues. Use the dropdown button and then select Mass Add and follow the prompts.
- Mass Add Issues: Under the Products page under Issues tab, you can mass add issues. Use the dropdown button and then select Mass Add and follow the prompts.