This article discusses each of the functional areas of the new flat plan and how to navigate within this feature.
This article will discuss navigating your way around the flat plan.
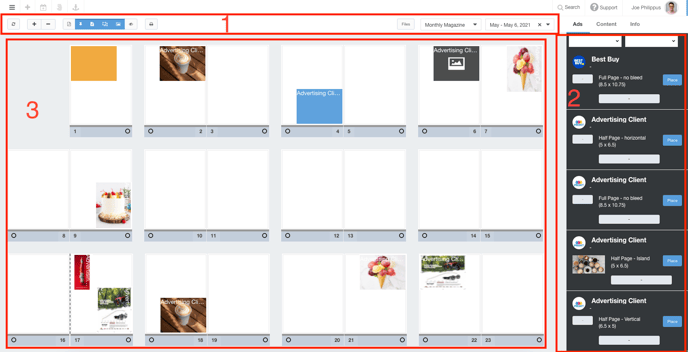
The flat plan is made up of 3 functional areas:
In addition, there are some navigation and quality of life improvements with this release that are very exciting!
Top Navigation
Area 1, or the top navigation bar, contains several viewing options as well as the ability to quickly change between various flat plan issues.
- Use the +/- buttons in the top left corner to expand or contract the pages in the flat plan viewing area.

- Use the View Options menu to complete many of the necessary steps to work in the flat plan viewer.
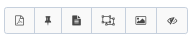
- Click the PDF button
 to preview this flat plan as a PDF.
 - Click the Pin button
 to enable and disable the view for any unassigned placeholders for this flat plan.
 - Click the Hide/Show Content button
 to toggle the designated content spaces for your publication on and off.
 - Click the Hide/Show Line Items button
 to toggle line items on and off.
 - Click the Hide/Show Ad Images on Line Items button
 to toggle on and off the ad images pulled in from the Ad Library.
 - Click the Make Line Items Transparent button
 to toggle on and off the line items.
- Click the PDF button
- Click the Printer button
 to send this flat plan to the printer. Clicking this button will save your view from your workspace, so any images or placeholders that you have enabled will persist for viewing.
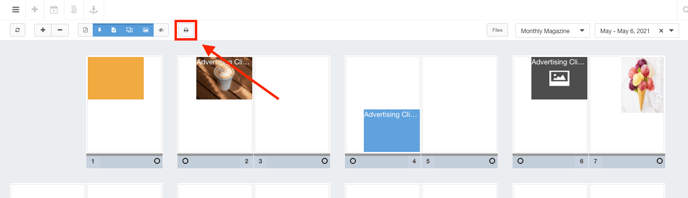
- When selecting multiple pages by using shift+click, you will see the swap icon
 appear. Clicking this will allow you to swap the selected pages.
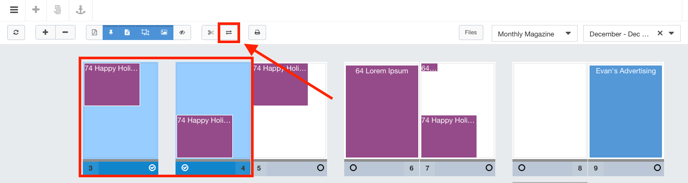
-

- Upon clicking the Files button, you will be presented with the option to upload either issue files or publication files. Publication files are files that are shared across the publication, whereas issue files are used specifically for just the issue.
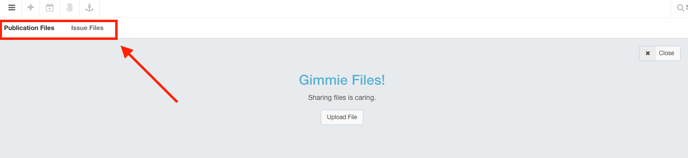
- Click the Close button when you are finished uploading your files, and you will be brought back to the flat plan.

- Upon clicking the Files button, you will be presented with the option to upload either issue files or publication files. Publication files are files that are shared across the publication, whereas issue files are used specifically for just the issue.
- Use the Product and Issue selector to quickly jump to a different flat plan.

Ads, Content, and Info
Area 2 contains all of the line items and content that are booked for this issue. This includes line items that have ads assigned and line items that do not yet have ads. You can also view and manage important flat plan information using this area.
Ads Tab
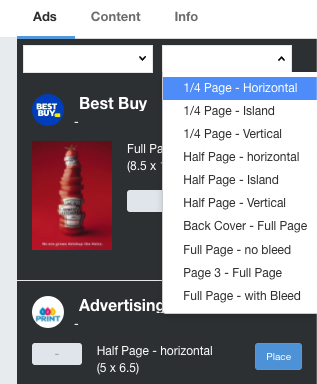
Click the Ads tab to see the line items that are booked for this issue.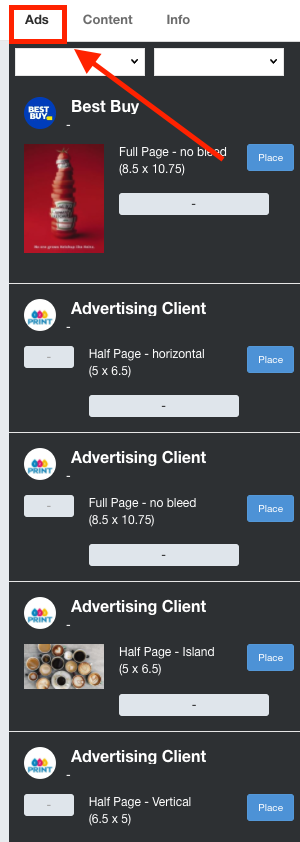
- Use the Filter drop-down menus to filter the results in the Ads tab per your choice.
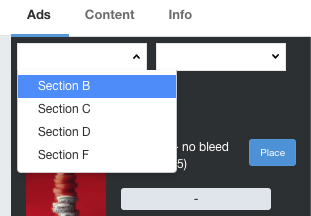
- Use the Section drop-down menu to filter options for line items that were booked into a particular section.
- Use the Unit/Size drop-down menu to filter options based on a particular unit or size.
- Use the Section drop-down menu to filter options for line items that were booked into a particular section.
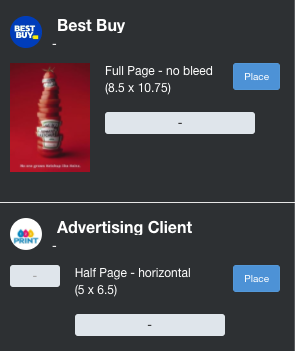
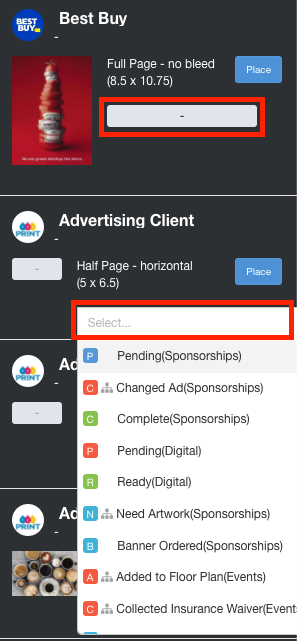
- For each of the ads that are present, you will see the name of the account that booked the ad, the ad unit or size for the ad, if there is an ad assigned, and what pipeline status this line item is currently in.
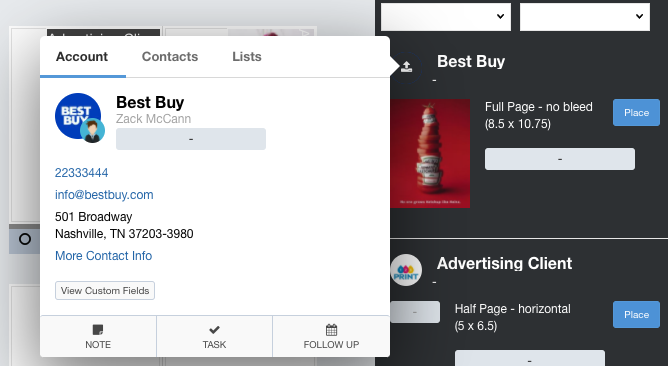
- Hover your mouse over the account name to see the Account Details Quickview.
- Click the Ad to display the Ad Library where you can choose the ad to assign to this line item. If there is no ad assigned, you can click the
 button to assign one.
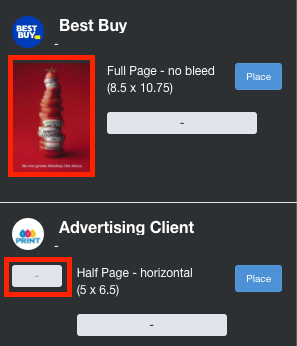
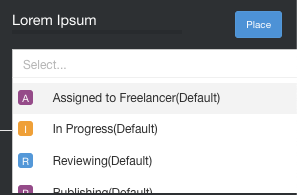
- Click the Pipeline Status button to assign this line item to a particular status.
- Hover your mouse over the account name to see the Account Details Quickview.
-
- Click the Place button to place this ad on the Flat Plan workspace.
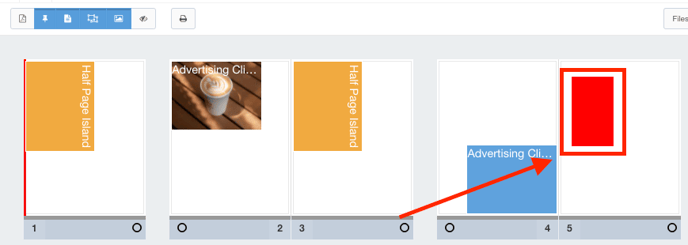
The system will automatically choose the ad size to place. For example, If the ad unit is a full-page, you will see a placeholder for that size (shown below). If the ad unit is a half-page, you will see a placeholder that indicates that size.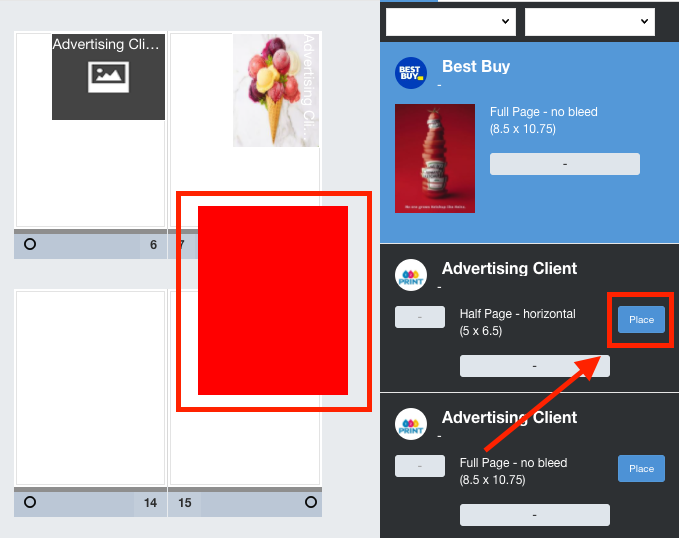
- Click the Place button to place this ad on the Flat Plan workspace.
The Content Tab
Click the Content tab to see the content that is booked for this issue.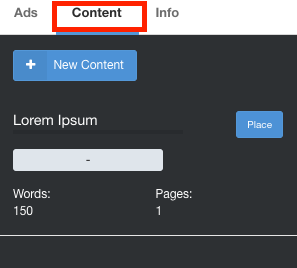
- Click the +New Content button to display the Content details panel where you can create new content for this issue.
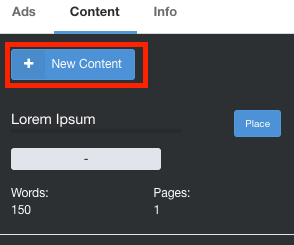
- Each content block will include the name of the content, how many words it contains, and the total page count.
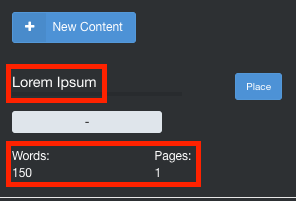
- Click the Pipeline button to choose which pipeline you would like this content to be assigned to.
The Info Tab
Click the Info tab to view and manage important information for this issue.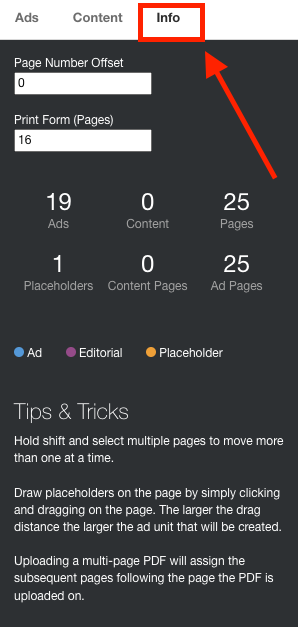
- Use the Page Number Offset field to designate how many pages you would like to be offset from the front of your publication. For instance, if your cover for your publication is not considered page 1, you can offset the flat plan by 1 to increase all of the page numbers by 1.
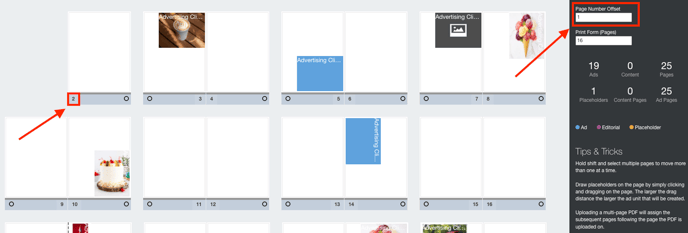
- You can use the Info tab to quickly see how many ads, content, pages, placeholders, content pages, and ad pages are represented in this flat plan.

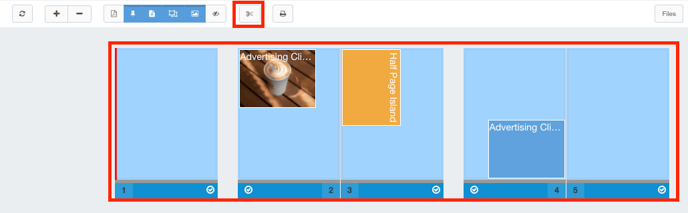
The Flat Plan Workspace
Area 3, or the Flat Plan Workspace, is the visual representation of your publication. Using this view, you can move line items, ads, and editorials directly onto the pages of your plan.
Click on a page to see the details for that page.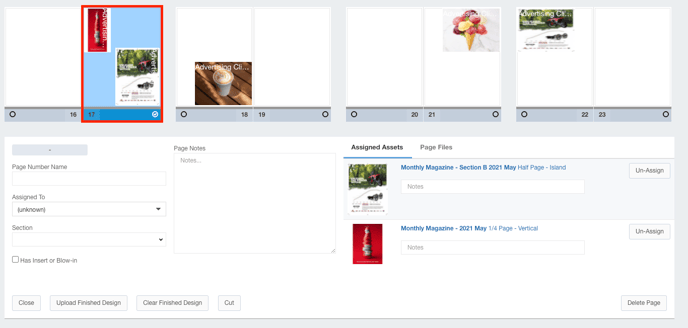
- Status Bar - Use the status bar
 to reflect the status for this page. This will be reflected in the band under the page.
 - Page Number Name - Use the Page Number Name field to rename this page. This will be reflected in the bottom band under the page.
- Assigned To: - Use the Assigned To: drop-down menu to choose whom this page is assigned to.
- Section - Use the section drop-down menu to choose which section of the publication this page is designated for.
- Has Insert or Blow-in - Use the Has Insert or Blow-in check box to indicate if this page can wrap between connected pages.
- Page Notes - You can enter any page notes for your delivery team here.
- Assigned Assets Tab - Here, you will see all of the assets that are assigned to this page.
- You can click on the picture of the asset to display the ad library.
- If the asset is content, you can click the content name to display the Content Details Panel for this asset.
- You can un-assign ads here as well. Clicking un-assign will move this asset off of this page and into Area 2 where you can re-place it.
- Page Files Tab - Use this tab to upload and view any files that are associated with this page.
Along the bottom of the page details view, you will see several buttons for this page: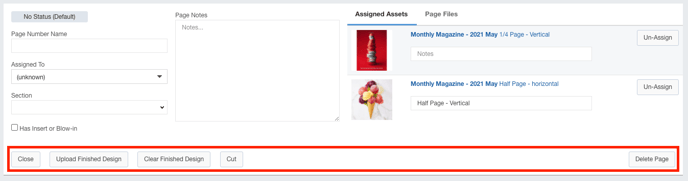
- Click the Close button to close the page details view.
- Click the Upload Finished Design button to upload a print-ready design for this page.
- Click the Clear Finished Design button to learn the print-ready design for this page.
- Click the Cut button to cut this page. Doing this will enable you to move the page elsewhere in your plan.
- Click the Delete Page button to remove this page from the flat plan. This will also remove any assets that have been assigned, so please ensure that you do not have anything placed on the page before you delete a page.
General Navigation
In addition to the placement options as described in this article, there are a few navigation and quality of life features in this flat plan release:
- Multi-Select - Hold the SHIFT key and click on pages to select multiple pages at once. You can then cut and paste these pages using the cut button found in the top navigation.
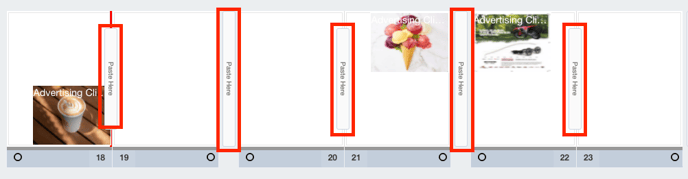
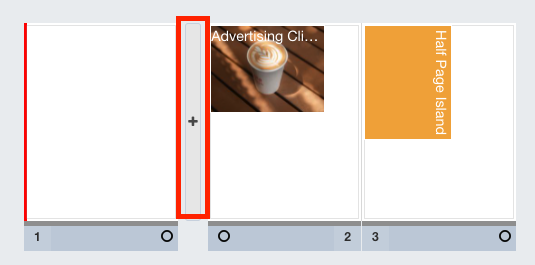
- Adding Pages - Hover your mouse at the beginning or end of a page to display the Add Pages button. Click this button to add a place at the indicated marker.
- Drawing Placeholders - You can draw placeholders on a blank page of your flat plan by clicking on the mouse and drawing a box to the appropriate size.