- Ad Sales Genius Knowledge Base
- Automation
- Workflow Examples
Configuring a Workflow to Send an Email When a Payment is Received
Our new Workflow automation is a powerful tool that unlocks several possibilities for how you operate in your day-to-day operations. One valuable workflow is the capability to send an email to a user of your choice whenever a payment is received.
To Configure the Workflow
Follow these steps to configure this kind of workflow.
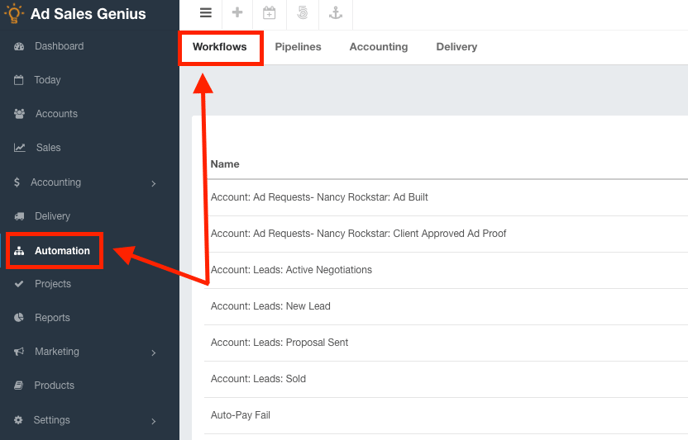
- Click Automation using the left-hand navigation menu, then click the Workflows tab.
- Click the +New Workflow button to create a new workflow.

- Use the Workflow Event drop-down menu to choose payment.
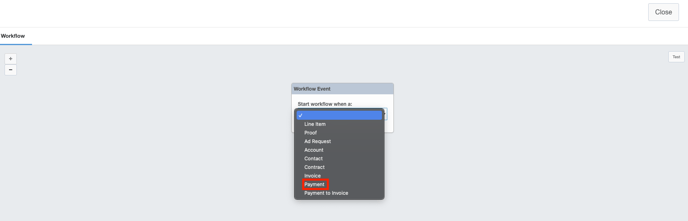
- Here you can choose whether you want to receive the email when the payment is created, updated, or applied to an invoice. Click the Save button when you are satisfied with your selections.

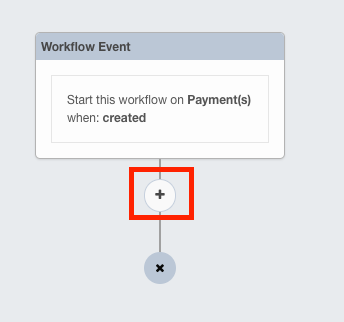
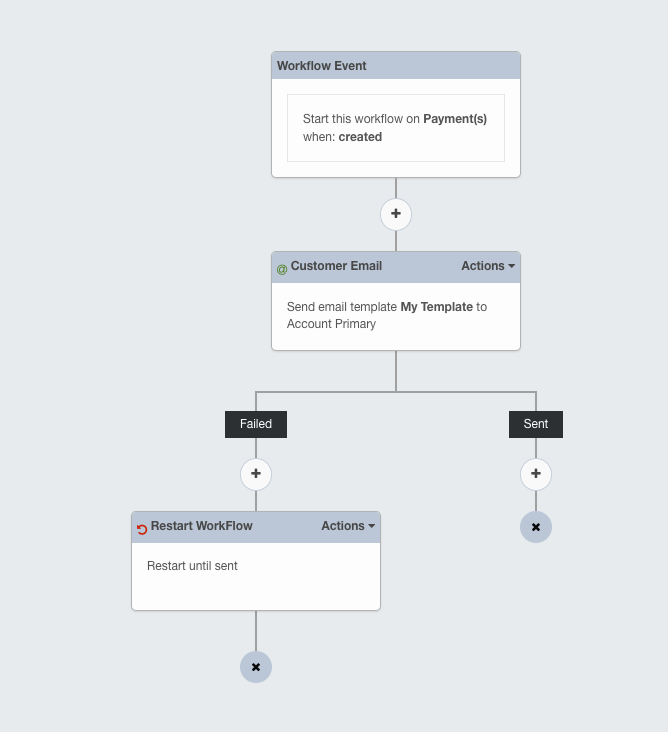
You now have the beginnings of a workflow that says "When a new payment is created, we need to do something". Let's now create our step. - Click the + button to add a new step.
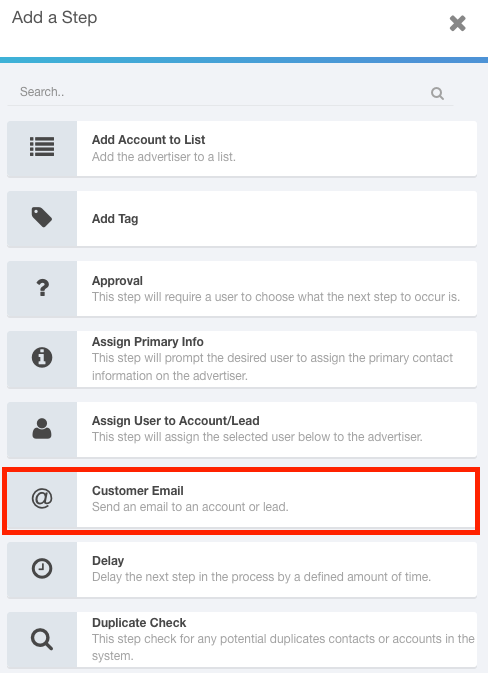
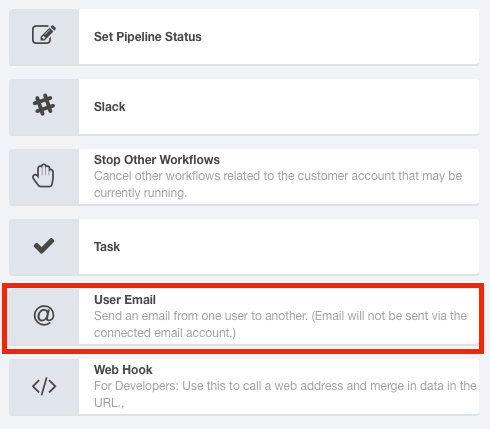
- Use the Add a Step dialog to choose to send an email to the customer or to an Ad Sales Genius user.
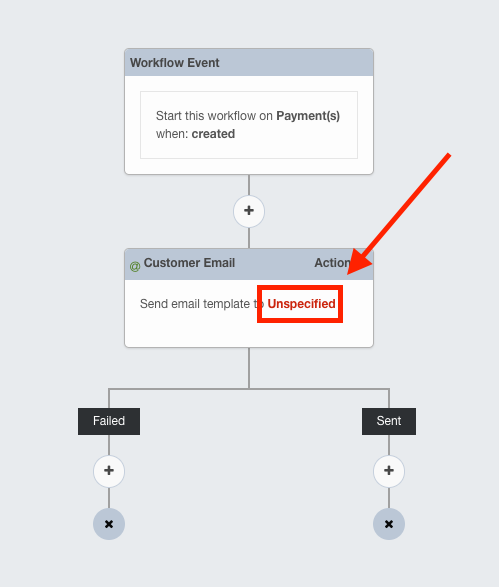
You will now need to configure the recipient for this step. - Click the Unspecified link in the Email step to configure the recipient of this email.
- Here you will configure the email that you are sending:
- Description - This is a description of the email you are sending. This is not customer-facing.
- Send To Email - Use this to choose whom you are sending your email to.
Note: When choosing a customer email, you can only send an email to the primary contact. - Template - Click the Select Template button to choose a pre-built email template that you would like to send. You can also create a new template from this window.
Click the Save button when you are satisfied with your selections.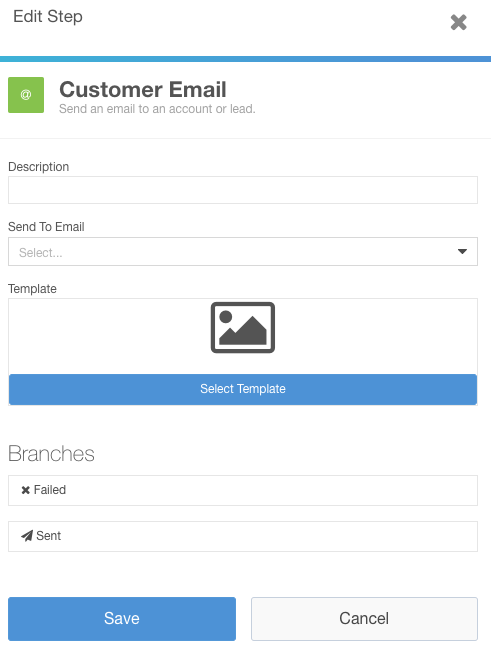
- From here, you can choose additional steps to take if the email was successfully or unsuccessfully sent. For instance, if the email was unsuccessful, you can choose to restart the workflow.
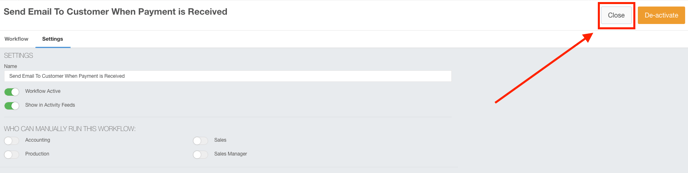
When you are satisfied with your workflow, you can name it and set it to active. - Click the Settings tab to see the settings for this workflow.
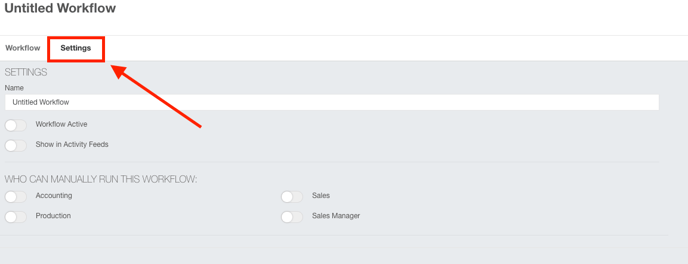
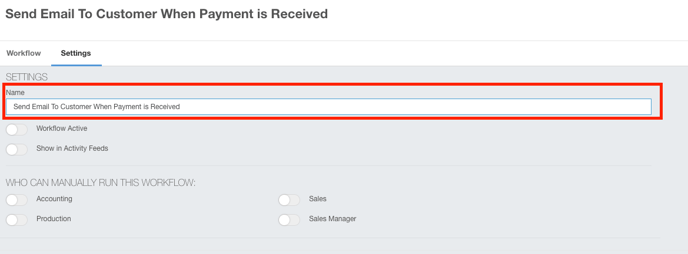
- Use the Name field to provide a name for this workflow.
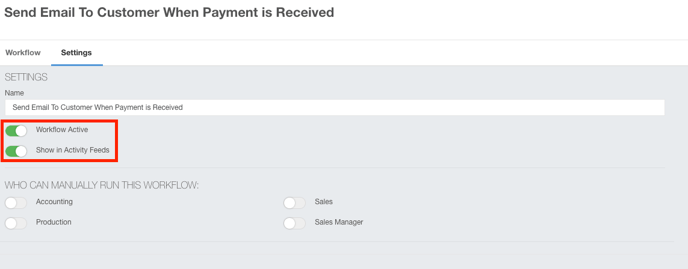
- Use the Workflow Active toggle to enable this workflow. Use the Show in Activity Feeds toggle if you would like this workflow to appear in your activity feed.
- Click the Close button when you are happy with your workflow.