
Google Ad Manager (formerly DoubleClick for Publishers (DFP)) is a free ad management solution that helps publishers sell, schedule, deliver, and measure all of their digital ad inventory. Ad Sales Genius integrates with Google Ad Manager, so you can book inventory directly from Ad Manager on proposals in Ad Sales Genius. The orders will automatically be placed in Google Ad Manager, complete with artwork placement and automated invoicing.
Important Note: Google Ad Manager must have API enabled in order for the integration to work. An administrator for the Google Ad Manager account can enable that. Please visit this google document for more information on enabling the API.
To Integrate Google Ad Manager
- Click Settings > Integrations on the left-hand navigation menu to see a list of all of Ad Sales Genius' integrations.
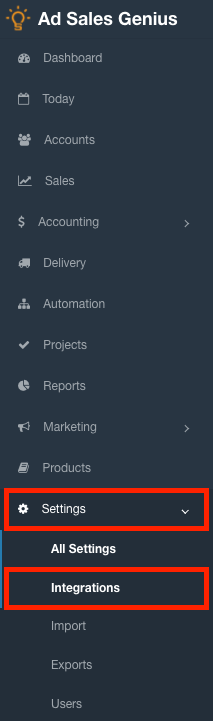
- Click the Configure button next to the Google Ad Manager integration.
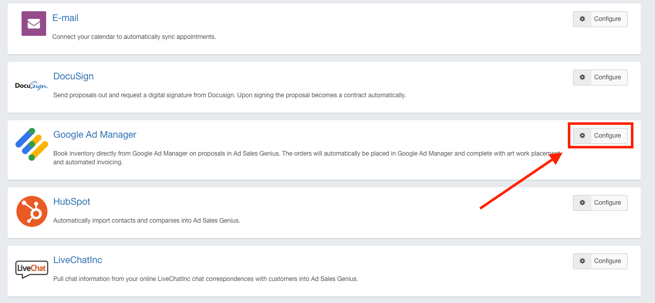
- Click the Connect button to be brought to the Google Ad Manager configuration screen.
- Here you will input your Network Code from your Google Ad Manager. This number is found in the URL when logged into your Ad Manager account.
For example, in the URL https://www.google.com/dfp/2032576#delivery, your network code is 2032576.
To Configure Your Products
Once you have completed the integration, you need to set up your products. With the Ad Manager integrations, your products are the packages that your sales reps are allowed to sell.
- Click Settings > Integrations on the left-hand navigation menu to see a list of all of Ad Sales Genius' integrations.
- Click the Configure button next to the Google Ad Manager integration.
- Click the New Product/Website button to set up your product(s).

- Input the name of the product (the name of the website) and choose which network this is connected to.

- Click the Create button when you are satisfied with your selections.

Creating your Ad Units
With the product created, you now need to configure your ad units. Depending on how you sell your website ads, your ad sizes can be anything from traditional ad sizes like Banner Ads or they can be your packages.
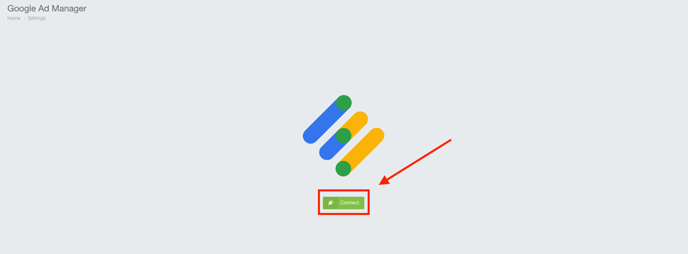
- From the Google Ad Manager Products page, click the Manage Units button next to your newly created product.
- Click the + Unit button to enter your parameters.

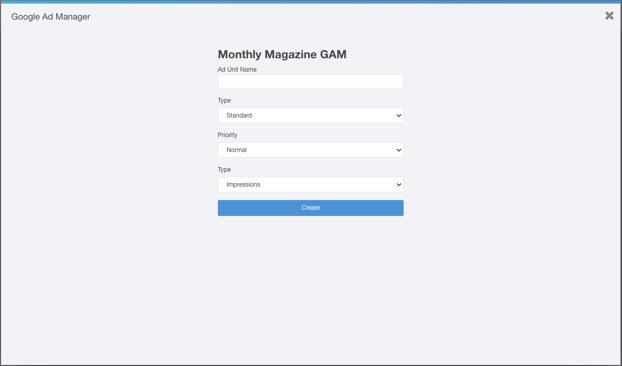
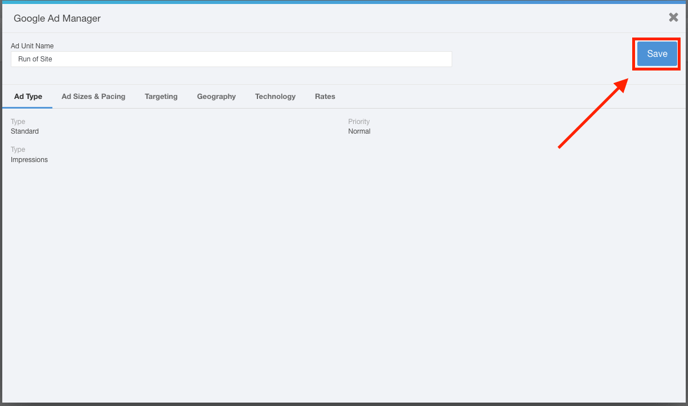
- Use the Ad unit form to configure the general settings for this ad. Click the Create button when you are satisfied with your selections.
Note: Once these settings are configured, they are set in stone. Please double-check your work before choosing these options
- Ad Size Name - This is the name of the Ad Size
- Type - Use this drop-down to choose whether this ad size is a standard or sponsorship type
- Priority - Choose the priority level of this ad size.
- Type - Use this drop-down to choose whether this ad is impressions or clicks-based.
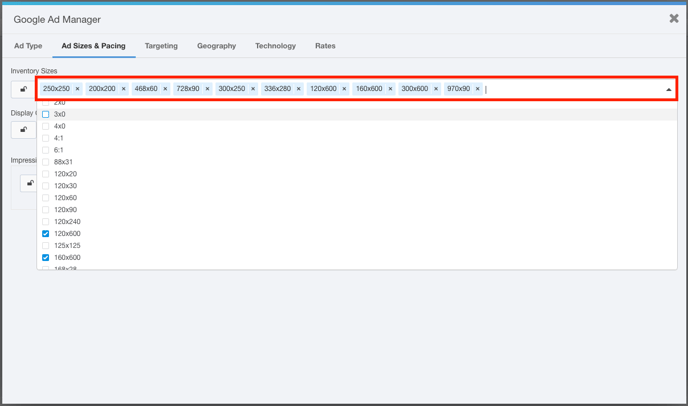
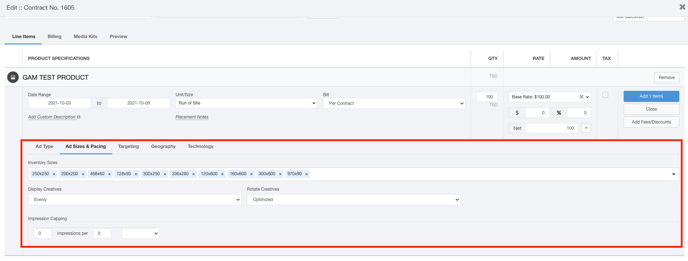
- Here, you will have the opportunity to choose which ad units you would like your sales reps to offer. Click the Ad Sizes & Pacing tab to choose your offered sizes.
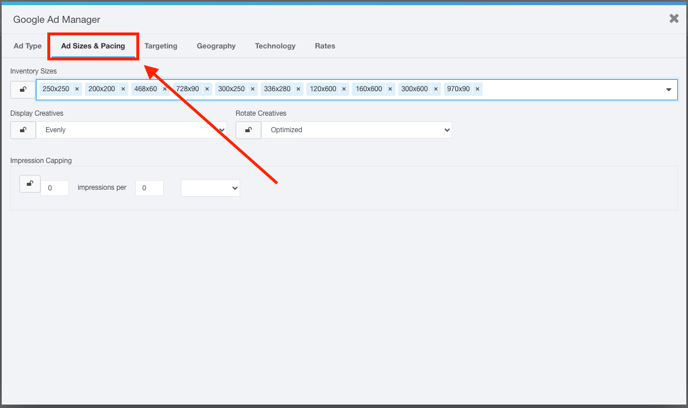
- Click the Inventory Sizes drop-down button to choose which sizes you have to sell.
- Locking your selections prevents sales and production staff from changing this ad size configuration. This can be done for any selectable fields in this menu.
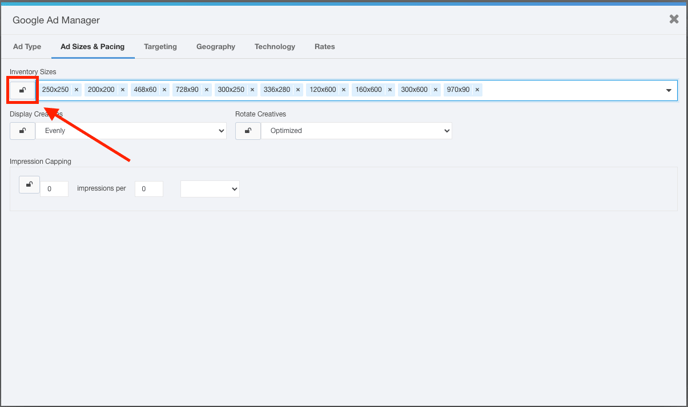
- Use the Display Creatives drop-down menu to choose how you want these ads distributed. If your line item contains multiple creatives, you can define which creative displays as part of a rotation when the line item is delivered to the user. If your line item only contains one creative, creative rotation rules don't have any effect.
- Evenly: Each creative is displayed equally at random.
- Optimized: Creative with the highest CTR displays more often.
- Weighted: Creatives displayed at a frequency you define.
- Sequential: Creatives display to each user in the order you specify.

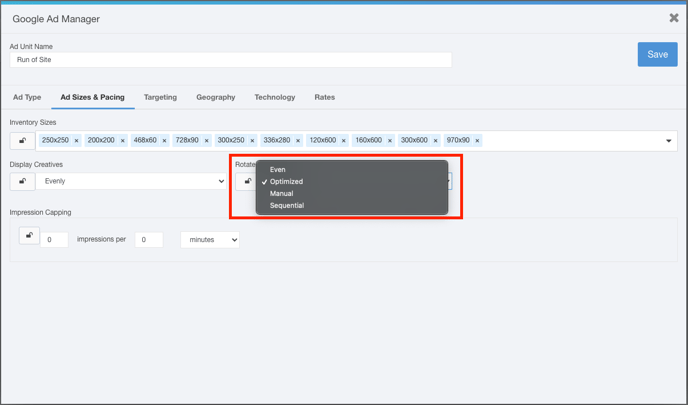
- Use the Rotate Creatives drop-down menu to control how creatives are displayed on a single webpage. This is used when there are multiple active creatives in a single line item.
- Even: Each creative is displayed equally at random.
- Optimized: The creative with the highest CTR displays more often.
- Manual: Creatives displayed at a frequency you define.
- Sequential: Creatives display to each user in the order you specify.
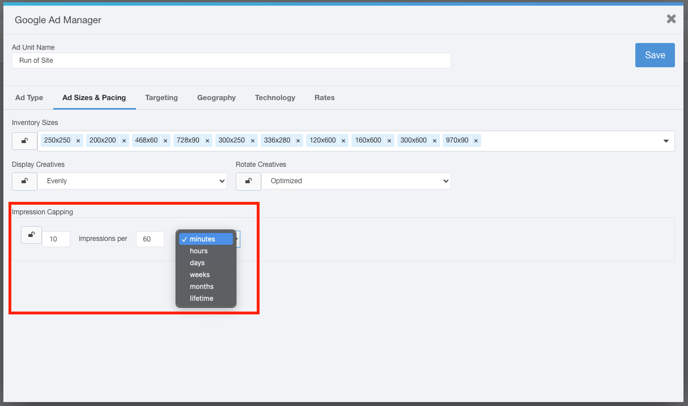
- Use the Impressions Capping section to limit the number of times a user can be served a line item within a time period. You can add up to 10 frequency caps per line item.
- Use the Targeting tab to include and exclude the placements for your ads. This information is provided directly from Google Ad Manager. For more information about targeting, check out this article.
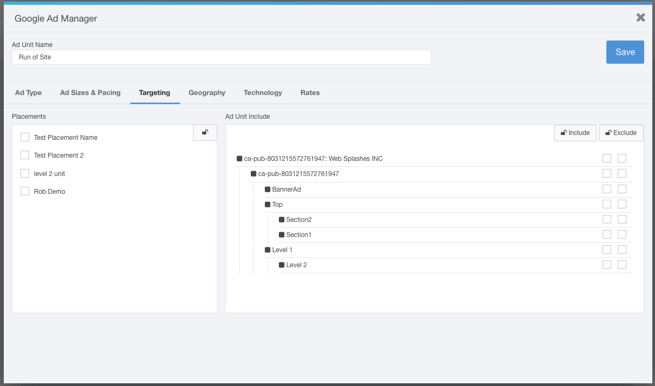
- Click the left checkboxes to include the results in your targeting, click the right checkboxes to exclude them.
Note: Excluding an item from the parent level will also exclude all children.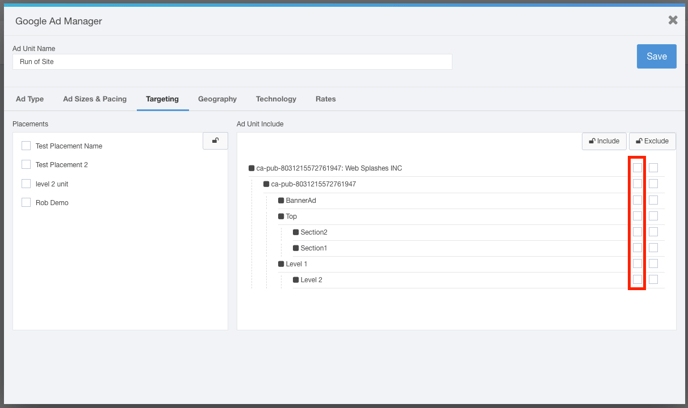
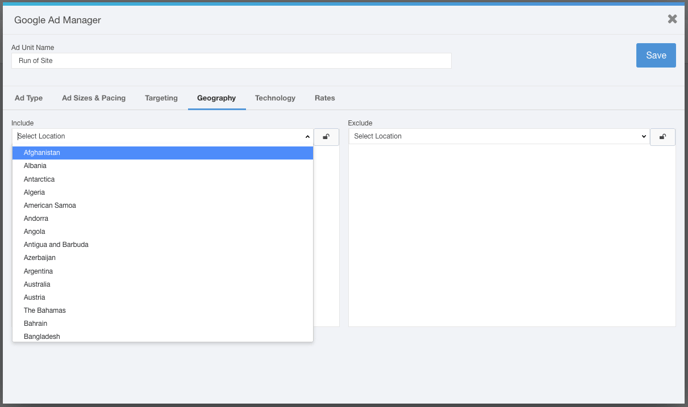
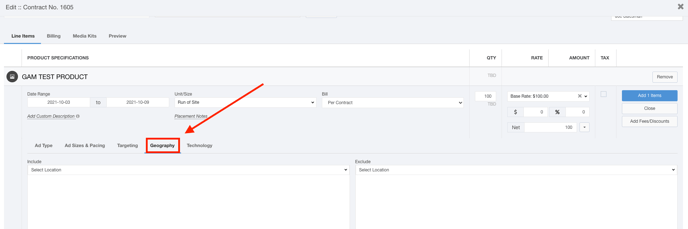
- Use the Geography tab to include and exclude different locations. You can type a city, state, or country in these fields.
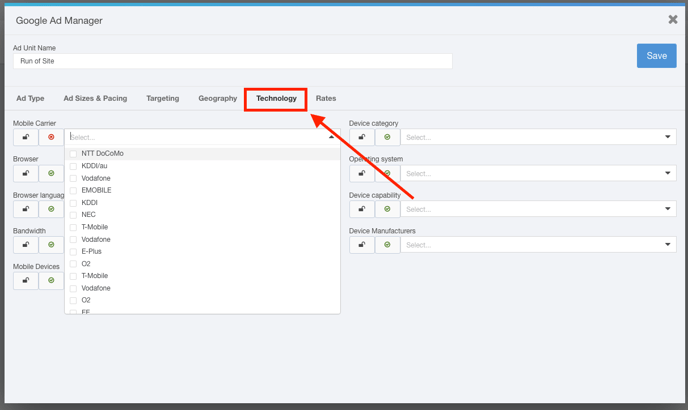
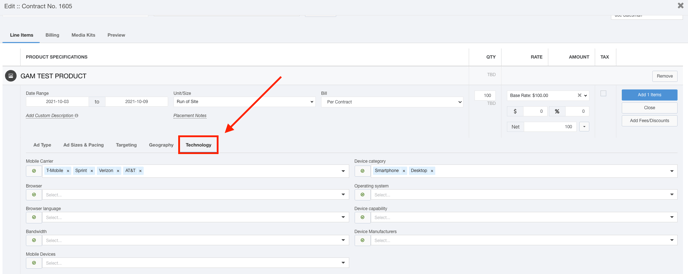
- Click the Technology tab to include and exclude specific mobile carriers, browsers, device types, operating systems, and more.
- Click the
 button to switch between enabled and disabled for your selections. If a field is disabled, it will display the
  icon.
icon.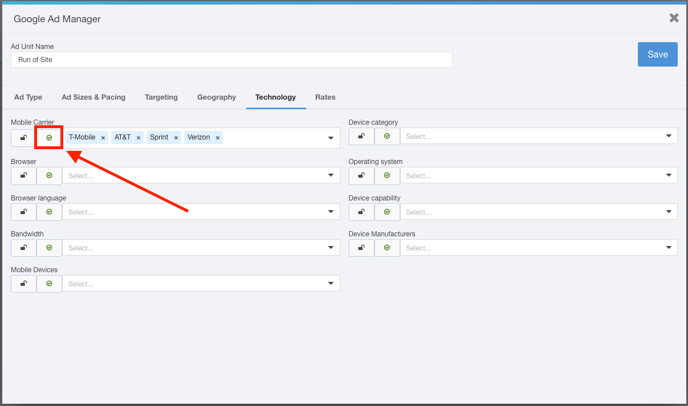
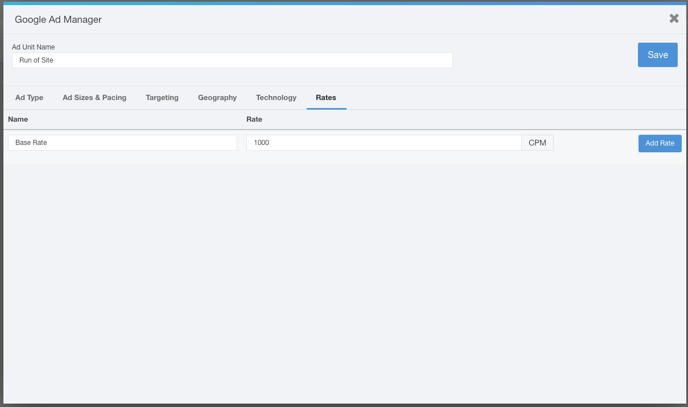
- Click the Rates tab to configure your rates for this Ad Unit.
- Provide a name and rate per CPM for your Ad Unit. Click the Add Rate button to add this rate.
- Click the Save button when you are satisfied with your selections.
Repeat steps 2-17 for any other ad units you would like to create for this product.
Adding a Google Ad Manager Insertion
Now that you have your Ad Manager Product set up, you can add it to your contract proposal as you would with a conventional product.
- Click Sales using the left-hand navigation menu.
- Click on the Contracts tab to see a list of your contracts and proposals.
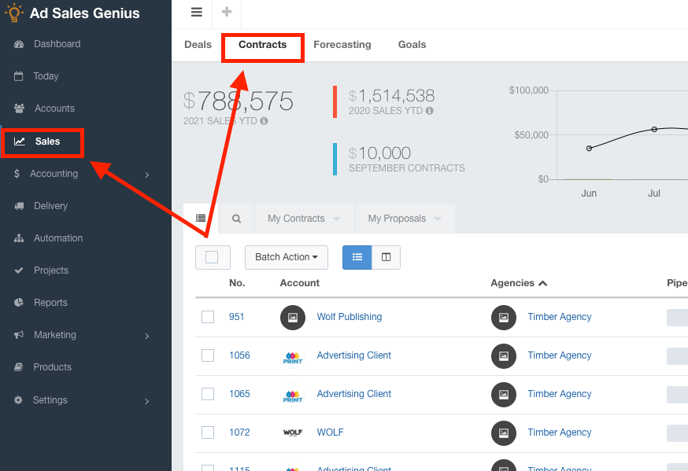
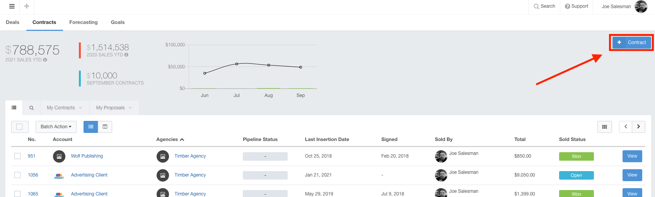
- Click +Contract to create a new contract or proposal.
- Complete the prerequisite information as discussed in this article.
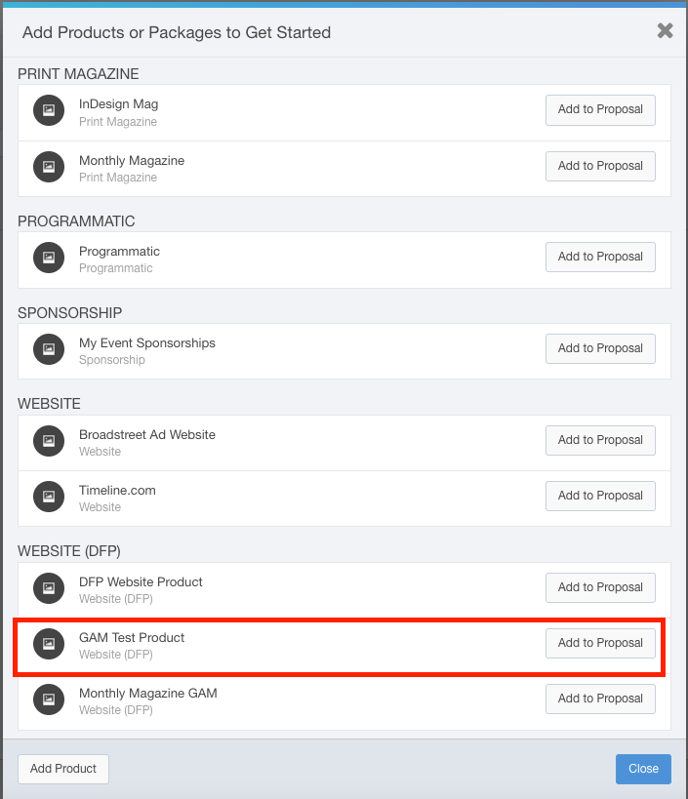
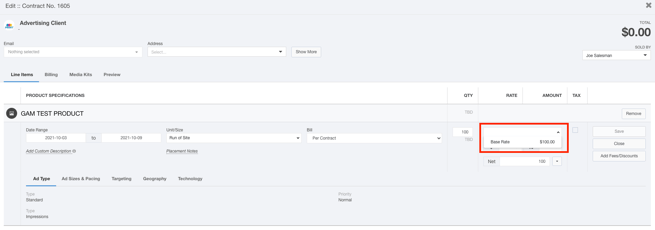
- Choose your product from the product selector screen.
- Choose the date range that you would like this product to run.
Note: These dates must be in the future.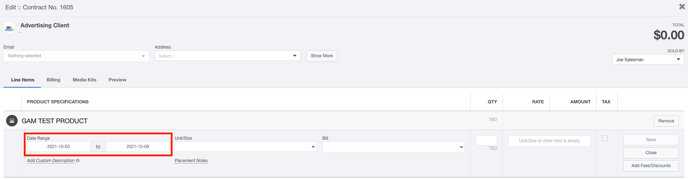
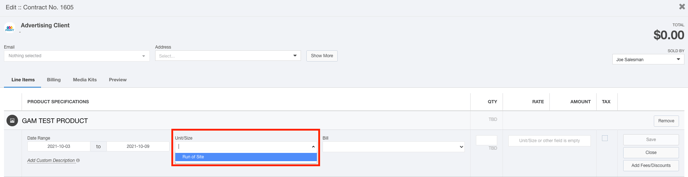
- Choose the newly created Ad Unit from the Unit/Size drop-down menu.
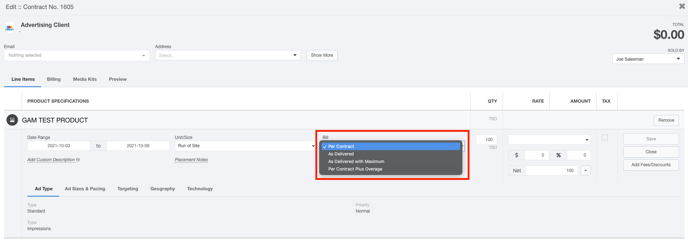
- Choose the billing method from the Bill drop-down menu. This option states when and how much your customer will be billed for the delivery of this product.
- Per Contract: This option is a fixed amount. If you are selling 100 impressions for $1000, the customer will be billed this no matter what
- As Delivered - This option will bill the customer as the product is delivered.
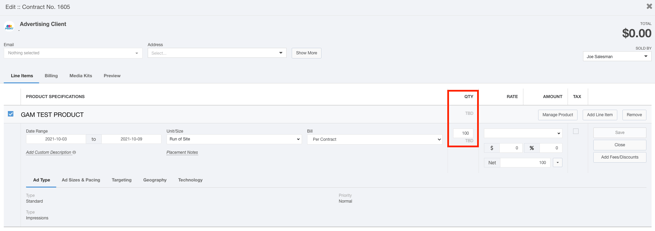
- Use the Quantity field to charge per impression. For example, if the customer purchased 100 impressions, the quantity would be 100.
- Choose your Ad Rate from the drop-down menu.
- Use the Ad Rates & Pricing menu to book specific ad sizes for this product. You can configure display, rotation, and capping for the product here as well.
- Click the Targeting tab to set your targets for this product.
Note: The left checkbox is to include this Unit, the right checkbox is to exclude it.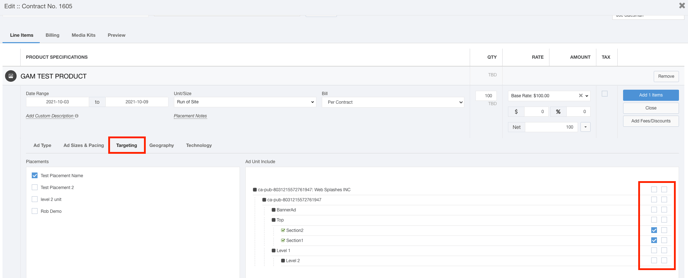
- Click the Geography tab to include or exclude a specific location for this product to appear.
- Use the Technology tab to include and exclude targeting your ad to certain technology limitations.
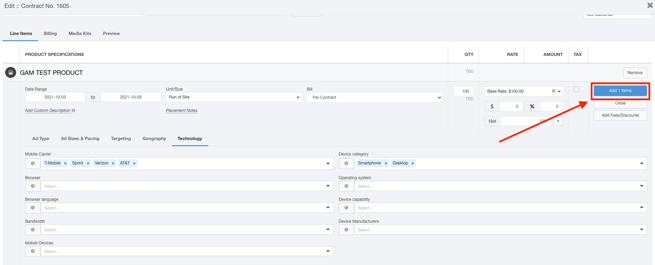
- Click the +Add Line Item button when you are satisfied with your selections.
Billing Your As Delivered GAM Product
If you chose 'Per Contract' as your billing method, you can invoice this product in the usual means. You can find more information on that here.
If you configured your product as 'As Delivered', you can import the delivery directly from Google.
- Click Accounting > Billable Line Items using the left-hand navigation menu to see your line items that are ready to be invoiced.
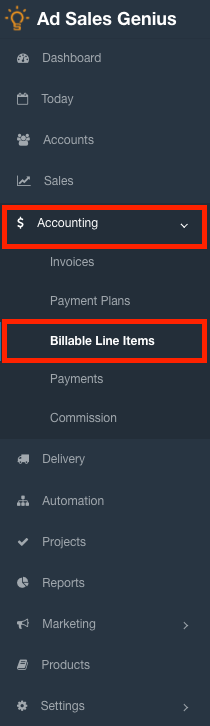
- Click the Import Delivered button to import the delivery data from Google into Ad Sales Genius.
Note: This process could take up to 10 minutes for the import to be completed.
- You can now invoice this product per instructions found here.