
Creating an exhibit product inside of Ad Sales Genius is similar to print products with a few additional details: Your Ad Sizes and rates will be in relation to the booths you're offering for the event, and booking space for the event requires that you upload a floor plan of the event.
This article will walk you through creating an exhibit product.
To Create an Exhibit Product
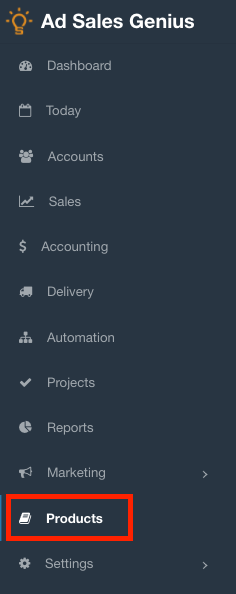
- Click Products using the left-hand navigation menu.
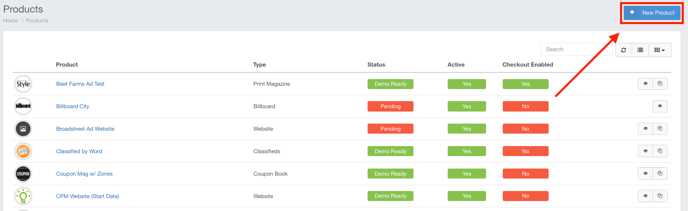
- Click on the + New Product button to begin the product creation process.
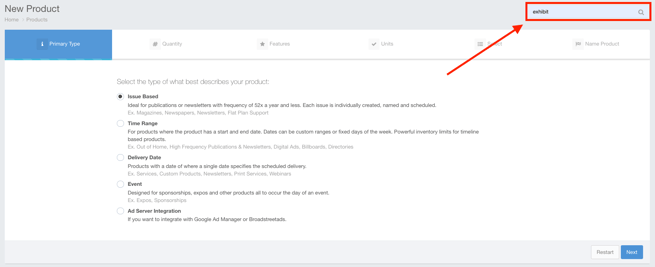
- Use the Search Bar located in the upper right-hand corner of the page to search for 'Exhibit'.
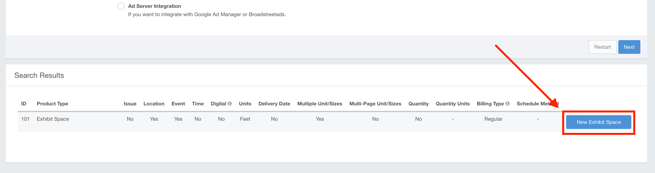
- Click the New Exhibit Space button to begin creating your exhibit spaces.
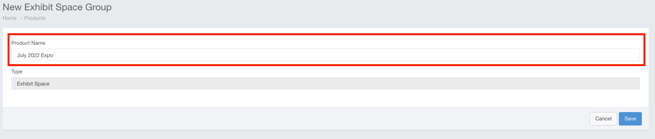
- Use the Product Name field to provide a name for your product. Click the Save button when you are satisfied with the name of this event.
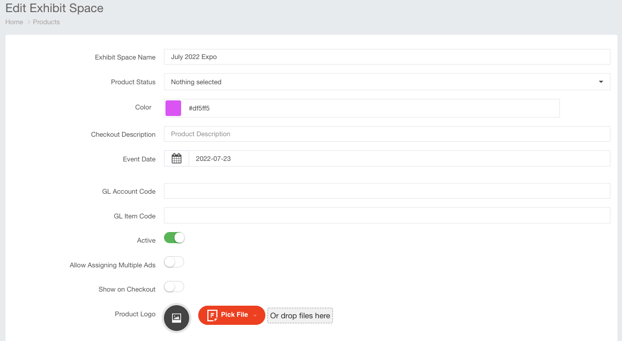
- Use the Edit Product window to edit the following fields:
- Exhibit Space Name - This is the name of your product.
- Product Status - If you have custom product statuses configured, you can choose that here.
- Color - This is the color that will display on your production calendar.
- Checkout Description - If you use Checkout, you can enter the description that is displayed here.
- Event Date - This is the date of your event.
- GL Account Code - If you use General Ledger Codes, put the Account Code here.
- GL Item Code - If you use General Ledger Codes, input the Item Code here.
- Active Status - Here is where you can mark the product as active or inactive.
- Show on Checkout - Enable this toggle switch to display this product on your Checkout page.
- Product Logo - Use this field to upload a logo for your event.
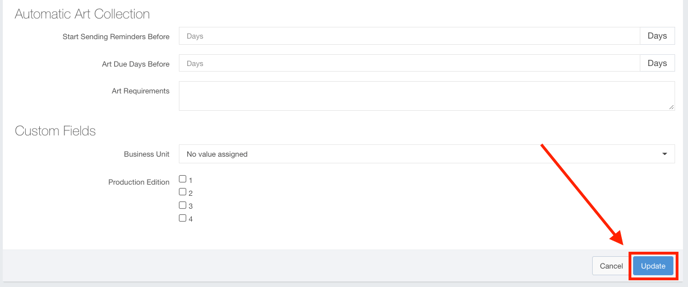
- Click the Update button when you are satisfied with your selections.
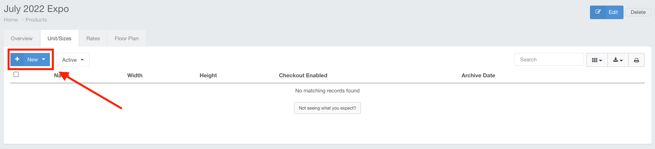
- Click the Unit/Sizes tab to begin creating your booth sizes.
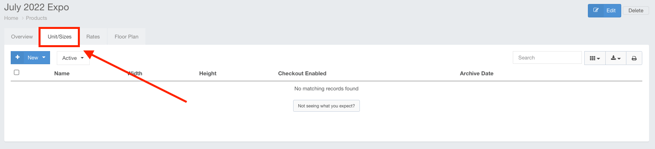
- Click the +New button to add your first ad unit for this product.
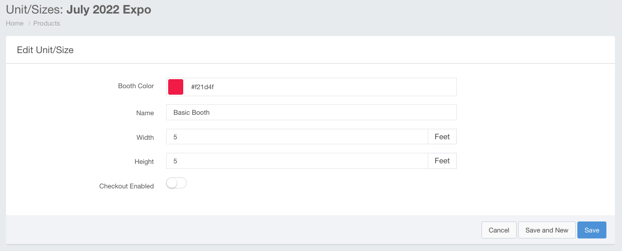
- Use the Unit/Sizes window to add the following information:
- Color - This is the color that will be displayed on the floor plan when a booth is booked for this ad unit.
- Name - This is the name of this unit.
- Width - This is the width of the space you are booking. Note that the dimensions for this example are measured in feet, but this is dependant upon which event type you chose.
- Height - This is the height of the space you are booking.
- Checkout Enabled - If you would like this ad unit to be available to purchase on your checkout page, enable this toggle switch.
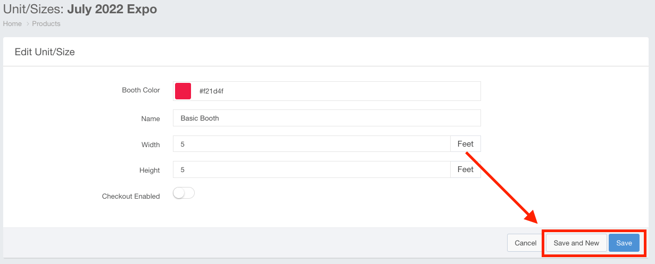
- Click the Save button if you do not need to configure another ad unit. If you do need to create more ad units, click the Save and New button and repeat step 10 for the subsequent units.
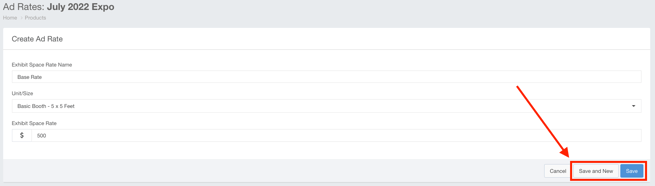
- Use the Create Ad Rate window to complete the following information:
- Event Rate Name - This is the name for your rate.
- Unit/Size - Use this drop-down menu to select the ad unit that this rate applies to.
- Event Rate - Enter the dollar amount for this rate.
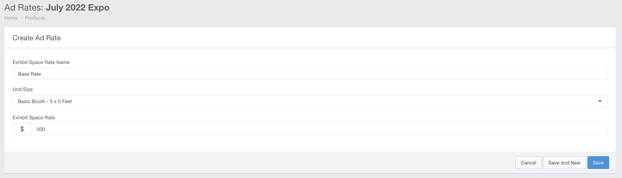
- Click the Save button if you do not need to configure another ad rate. If you do need to create more ad rates, click the Save and New button and repeat step 12 for the subsequent rates.
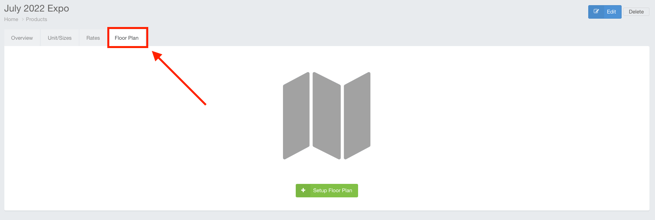
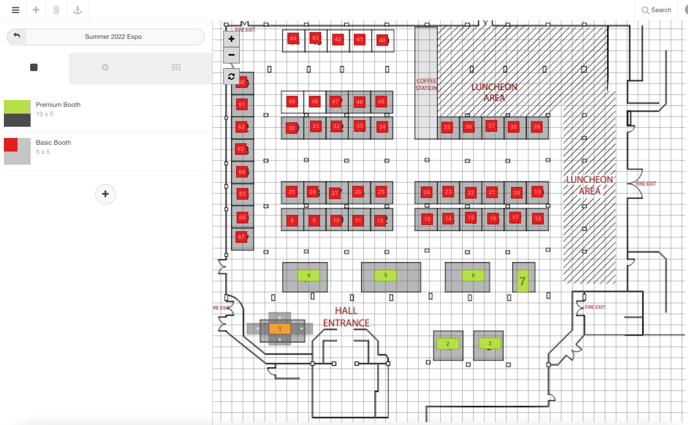
You will now need to configure the floor plan for this event. - Click the Floor Plan tab to set up your floor plan.
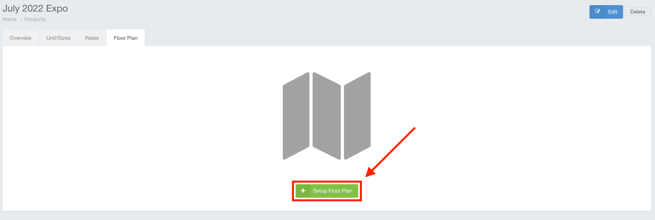
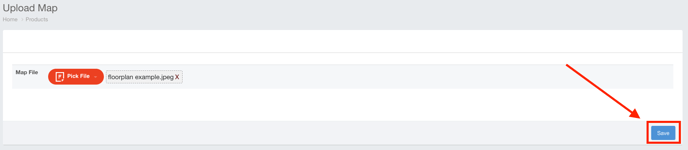
- Click the Setup Floor Plan button where you will be prompted to upload a version of the event's floor plan.
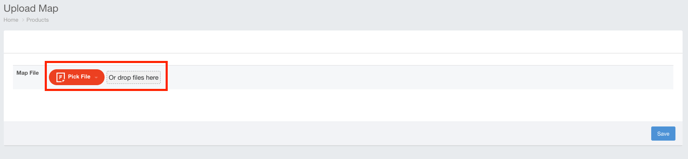
- Click the Pick File button to choose your floor plan file from your computer or you can drag the file to the box labeled 'Or Drop Files Here.
- Click the Save button when you have uploaded your floor plan file.
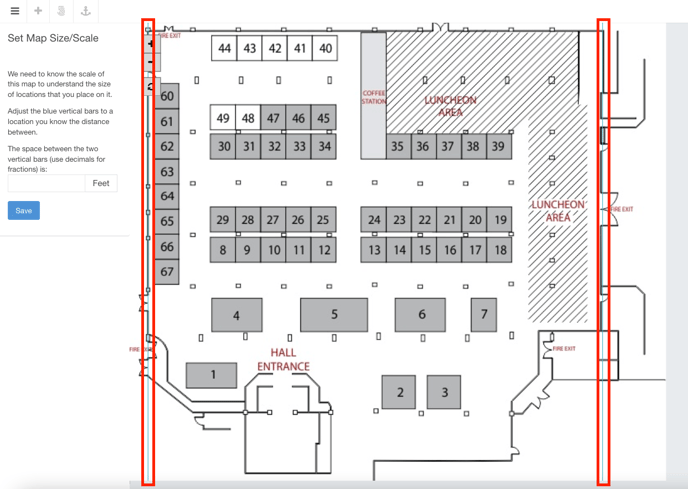
- Drag the blue vertical bars to a location you know the distance between. This will tell the system the scale of the image.
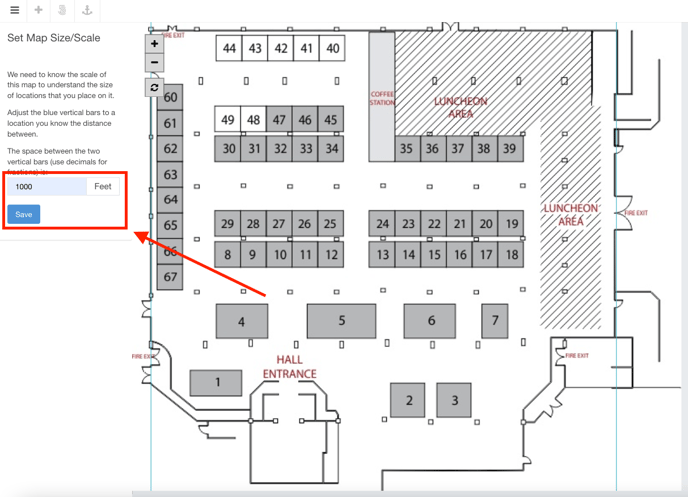
- Use the Set Map Size/Scale field to enter the distance between the two blue bars, then click the Save button.
- Drag-and-drop your ad units onto their respective booth spaces on the floor plan.
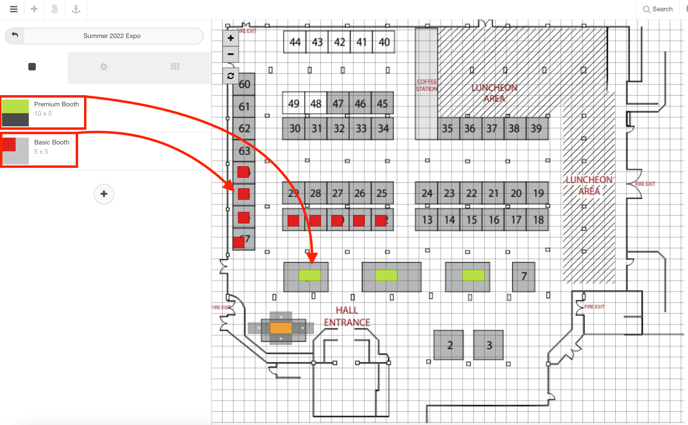
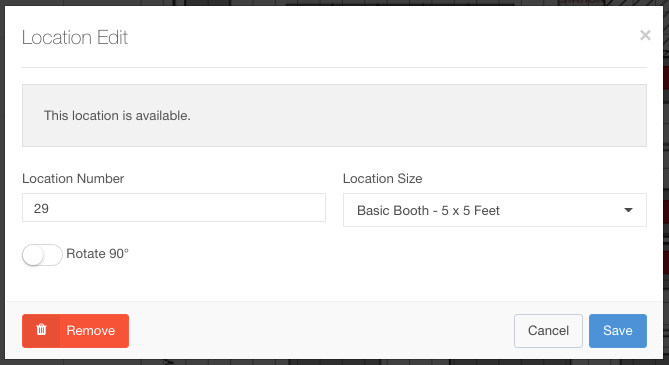
- Double click on an ad unit to open its properties. Here, you can assign a booth number, rotate the ad unit 90 degrees, and remove the ad unit from the floor plan.
- Complete steps 20 and 21 until all booths are accounted for.
Your Exhibit Space product has now been created.