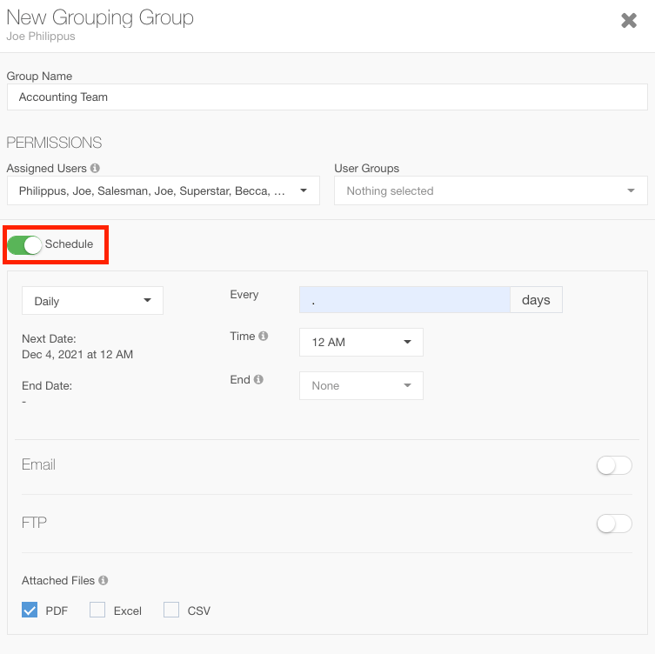
Emailing Reports on a Schedule
Any custom reports you make can be saved and sent out to your team.
To Save and Send Your Custom Report, follow these steps:
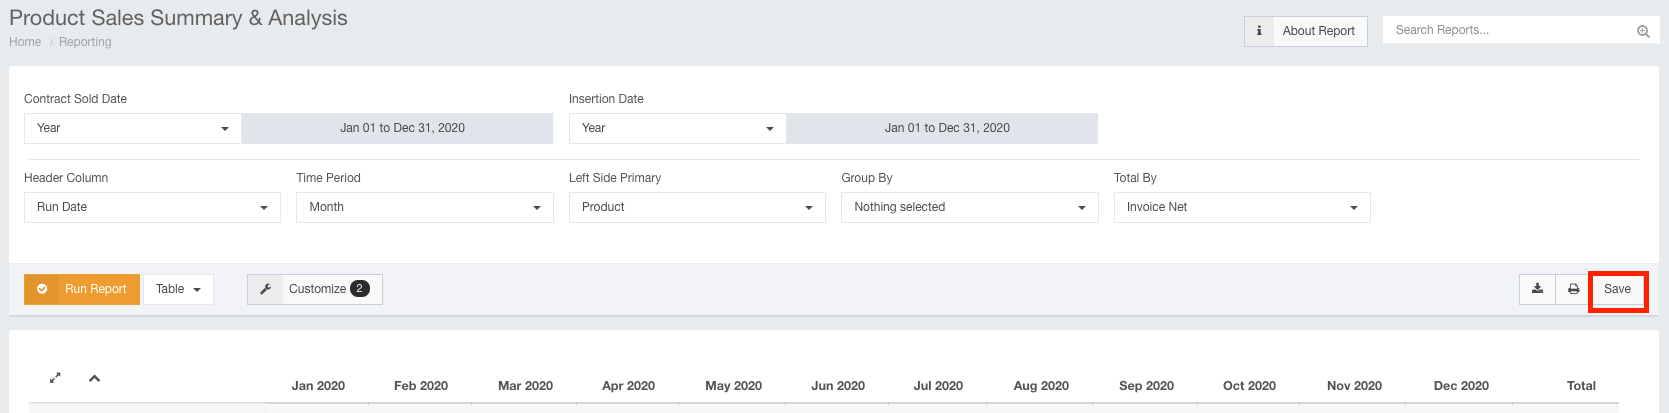
- Configure your report in the way that you wish to send it.
- Click the Save button to display the save dialog.
- Use the Save dialog to name the report and assign it to a group.
To save a group to send this report to, select the Create Group checkbox.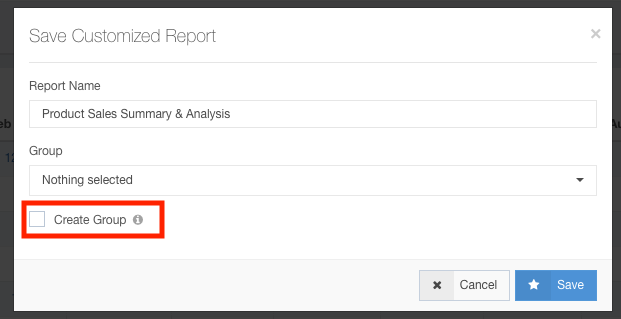
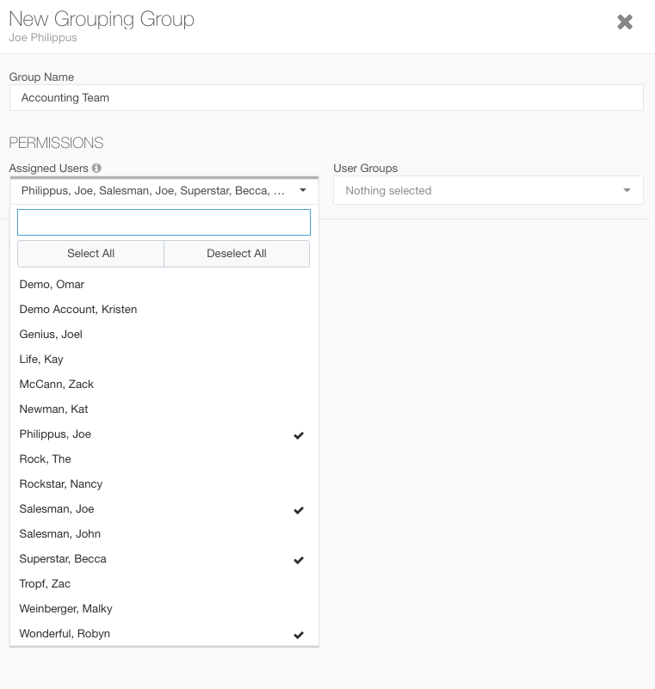
- Use the New Grouping Group dialog to name your group and select the members the report will be sent to.
- Select the Schedule Toggle switch to choose the time and frequency this report is run and sent.
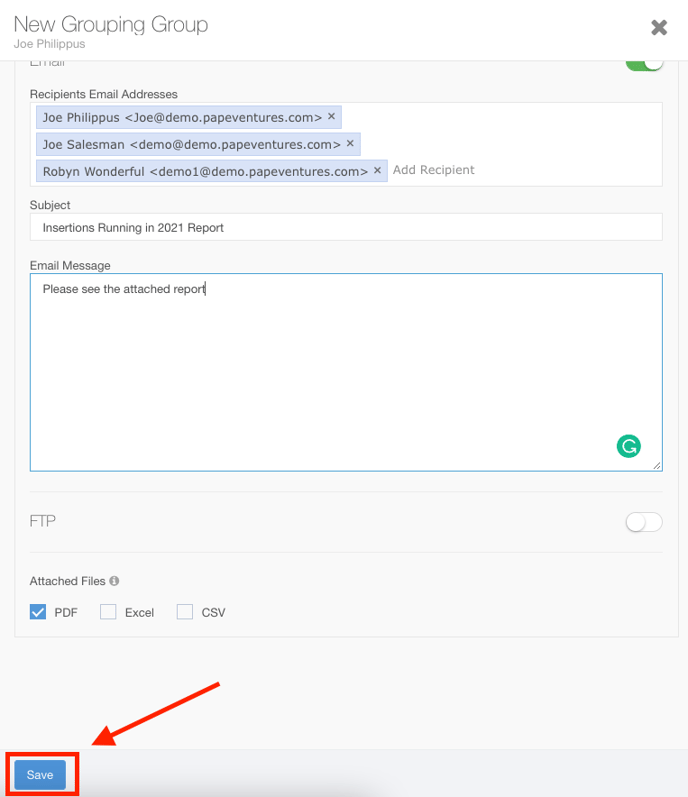
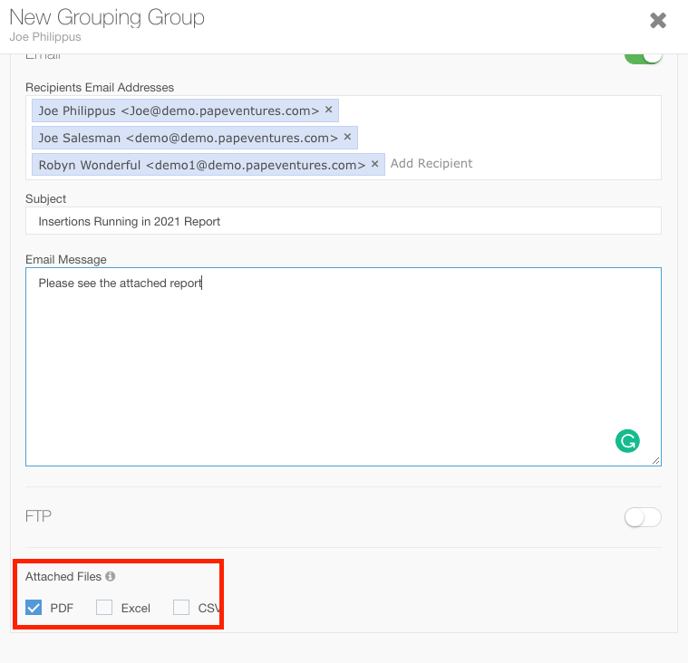
- Select the Email toggle to choose which email addresses this will be sent to.
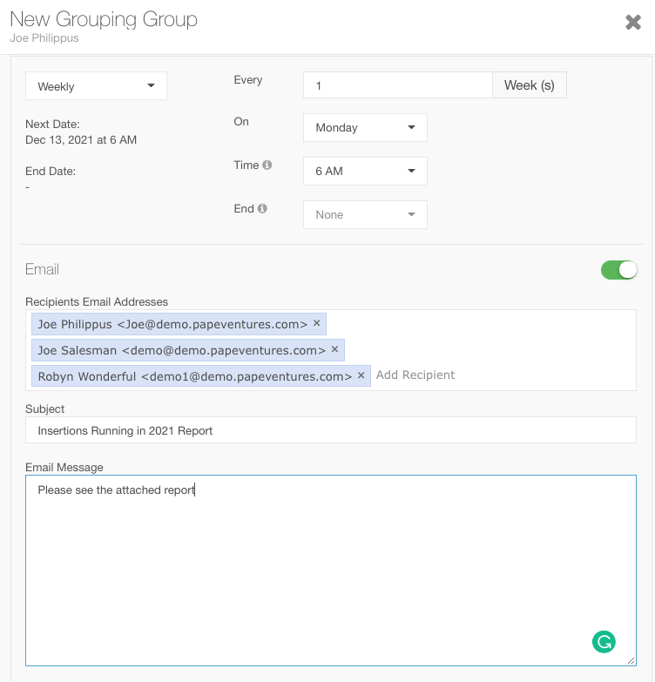
- Use the Attached Files section to choose which format you would like your report to be emailed in.
- Click the Save button to save your report.