Email Template merge tags allow you to format your email templates by simply dragging and dropping predefined content. You can include videos, HTML, dynamic content, and more using this feature.
Our Email Templates are created using Liquid by Shopify. Click here for more information on Liquid.
This article will discuss:
- Accessing your Email Templates
- Editing Your Email Templates
- Rows
- Content Blocks
- Merge Tags
- Saving your Email Templates and Viewing the Details of your Template.
Access your Email Templates
To access your Email Templates:
- Click Accounts from the left-hand navigation menu.
- Select Campaigns from the tabs at the top of the Accounts page.
- Click Manage Templates in the top-right corner of the screen.
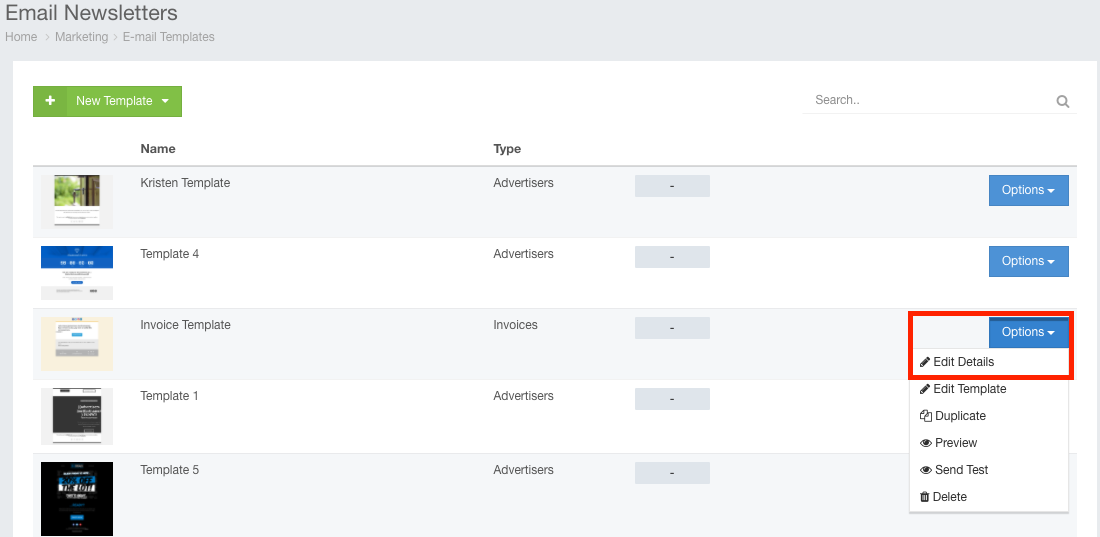
- Here, you will need to choose which template you want to edit by hovering your mouse over the template and clicking the edit button Edit button next to an existing template or you can create a new template by clicking the New Template button.
Edit your Email Templates
Upon clicking Add or Edit, you are brought to the Email Template page. Here is where you design the templates for use.
Rows
The main body of the email is divided into rows. You can add a new row structure by clicking on the rows tab and dragging one of the options into the body of the email. 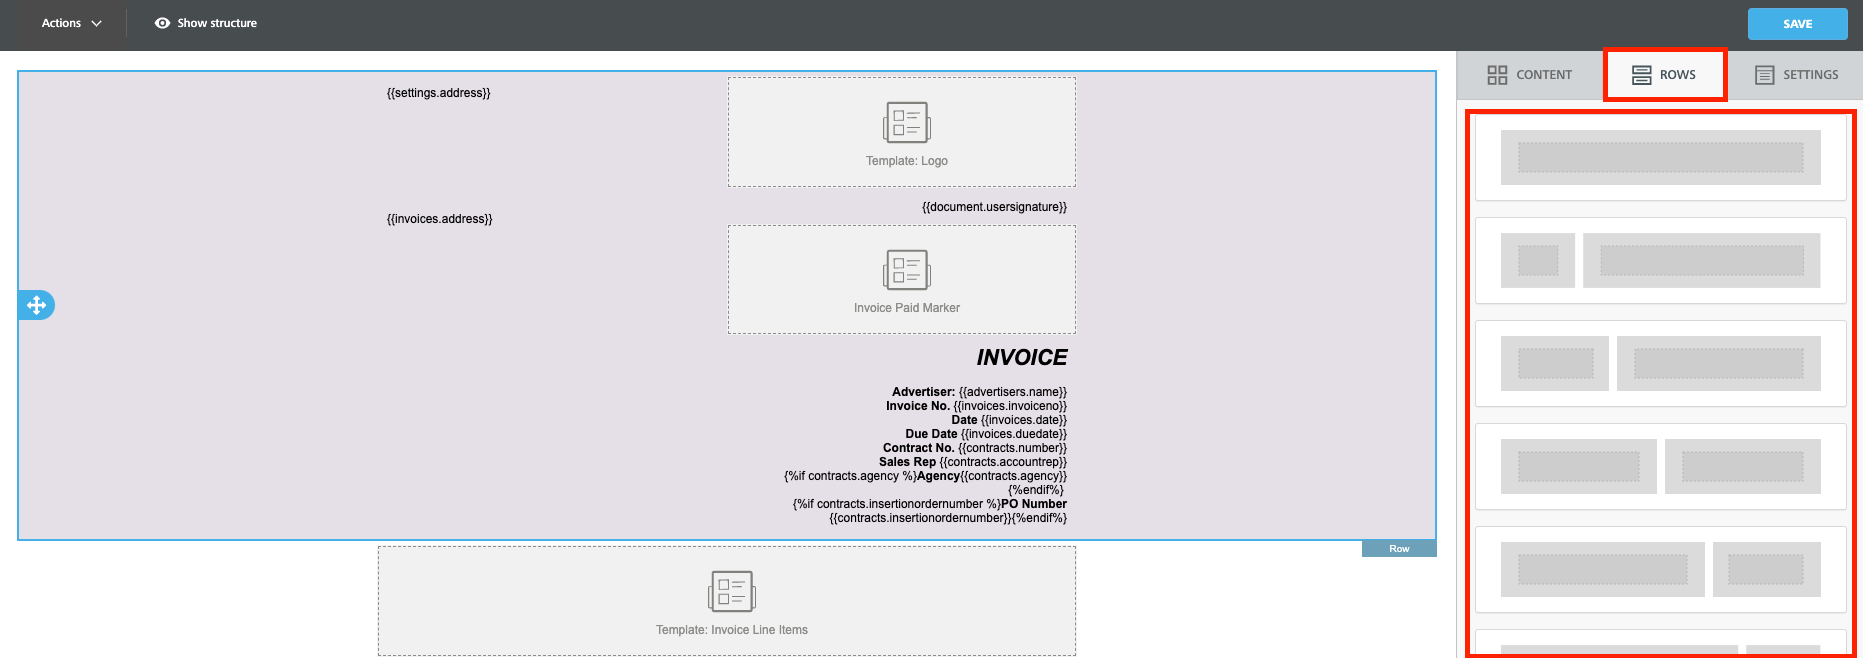
You can also move existing rows by highlighting the row and clicking the  button.
You can delete a row by highlighting the row and clicking the  button.
You can copy a row by highlight the row and clicking the  button.
Clicking the rows tab with a row selected displays the settings for the selected row.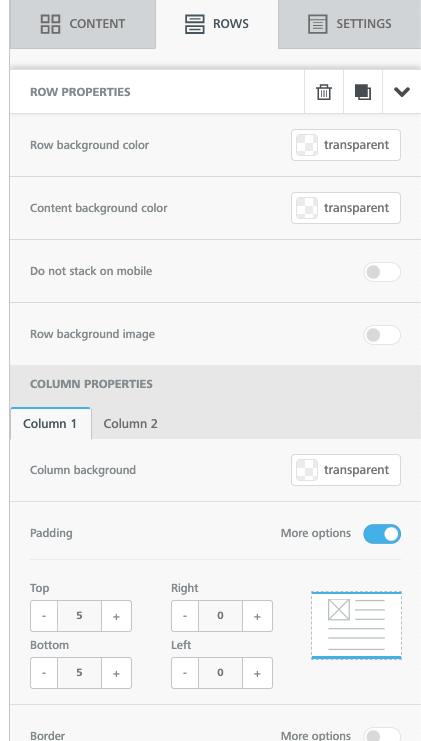
Content
Each row contains blocks of content. The following content blocks are available for use:
- Text
- This content box allows you to type in custom text. This is also the content box you will need for inserting .
- Image
- This content block allows you to insert an image onto your email.
Note: The maximum size for embedding image files into emails is 250Kb.
- This content block allows you to insert an image onto your email.
- Button
- This content block allows you to add a button for a call to action.
- Divider
- This is a simple line used to break up areas on your template.
- Social Media
- Use this to add icons with links to your various social media accounts.
- Dynamic Content
- This content block will allow you to choose specific content based on the type of template you are creating. For example, if you are creating an invoice template, you will see options like Contract Line Items, Tear Sheets, Only Payment Instructions, etc. here.
- HTML
- Use this content block to input your own HTML code
- Videos
- This will embed a video into your email. Clicking this will present you with the option to add a URL to your video.
- Icons
- Choose this to add an icon that is included in your file library.
In the example row above, there are several blocks of mixed content present:

To add a content block, click the Content tab and drag-and-drop the desired content type onto the row.
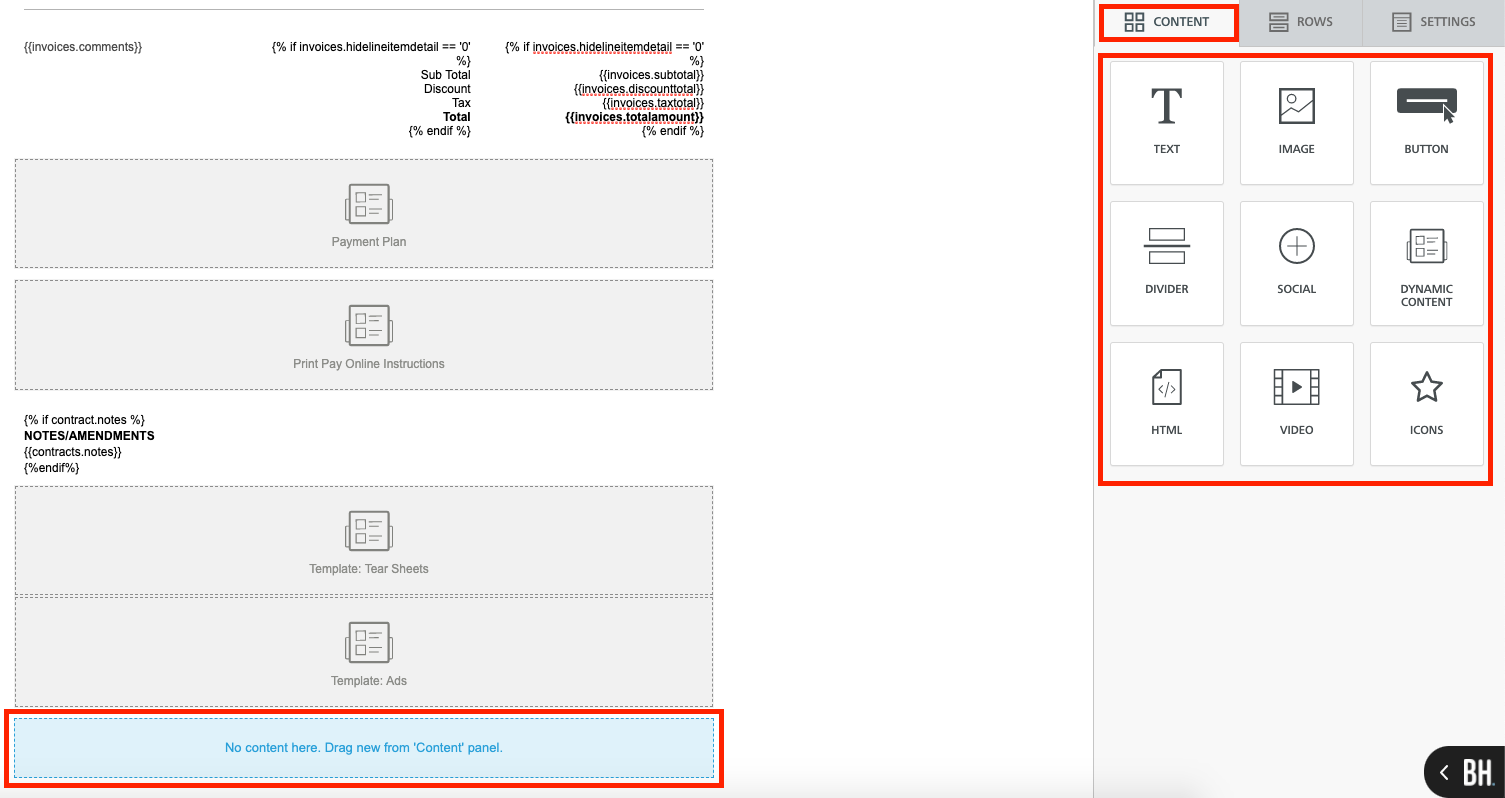
With the content block added, it now needs to be configured.
To do this, click on the content block and edit the properties in the right-hand menu.
Note: These properties change depending on which content block is selected. 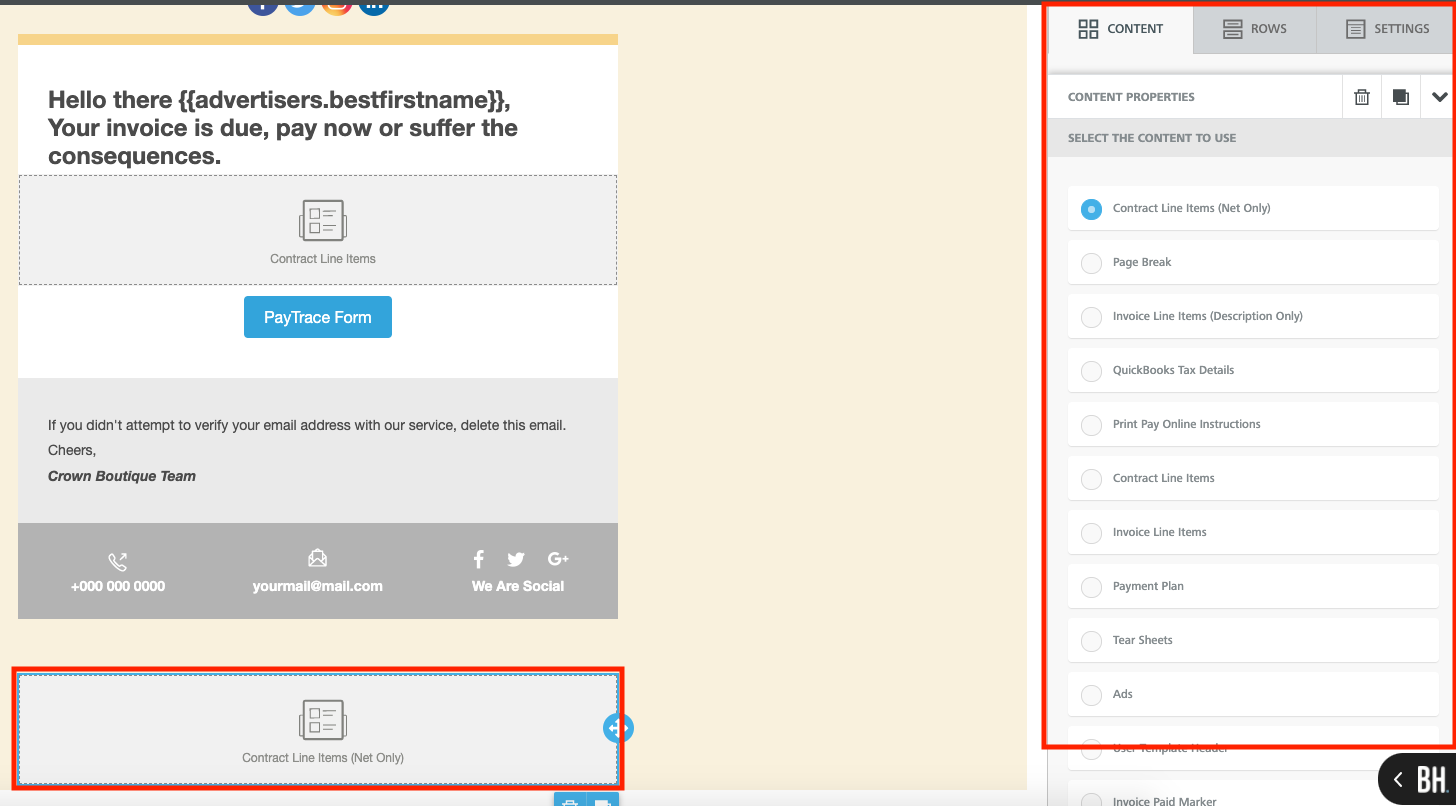
Merge Tags
When working with the text content block, you can input merge tags. Merge tags are a great way to give your emails a customized feel in the hands of your recipients. Merge tags are denoted by using {brackets} and are preloaded in the system to ensure ease of use. This merge tag will allow your email to contain the first name of the recipient as configured in the client's settings: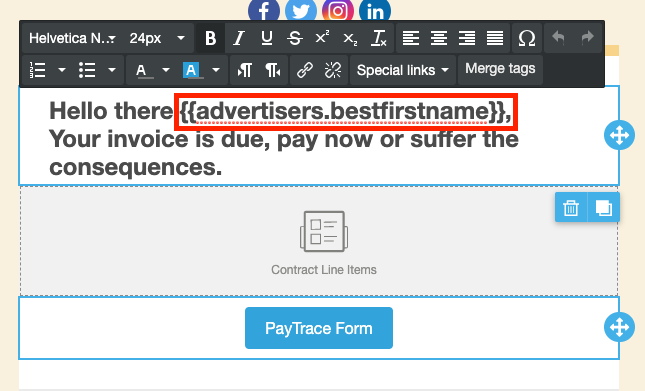
To add a merge tag:
- Click inside of a text content block to see the text menu.
- Move your cursor to the location where you want to add your merge tag.

- Click the Merge tags button to display the list of available merge tags.
Note: This list is scrollable, so if you do not see the merge tag you're looking for, scroll down.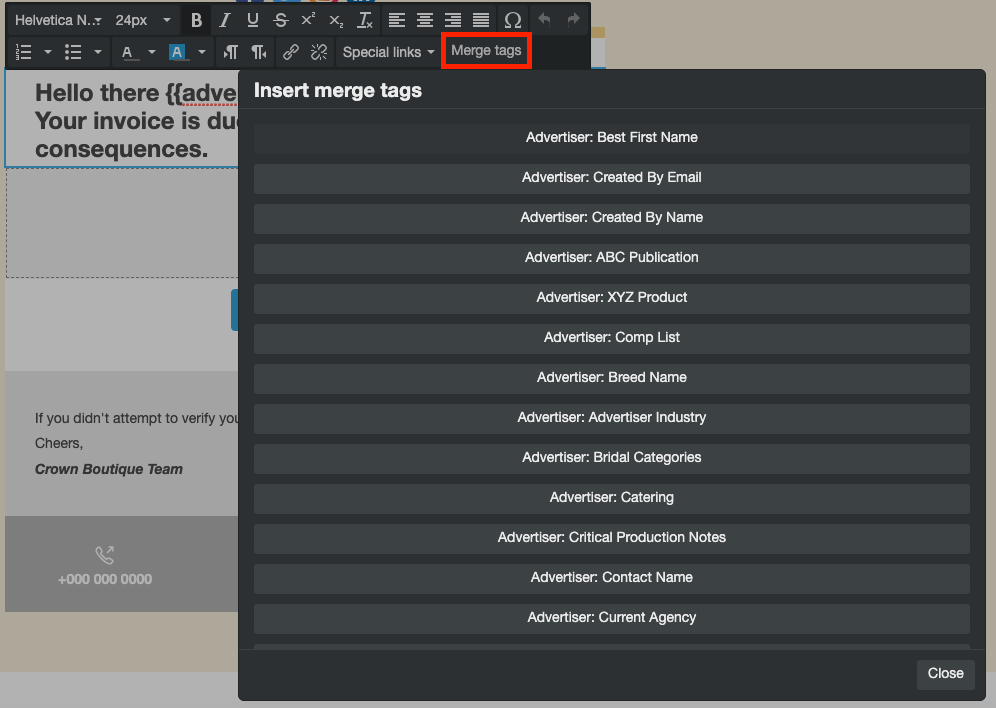
- Click the merge tag you want to add.
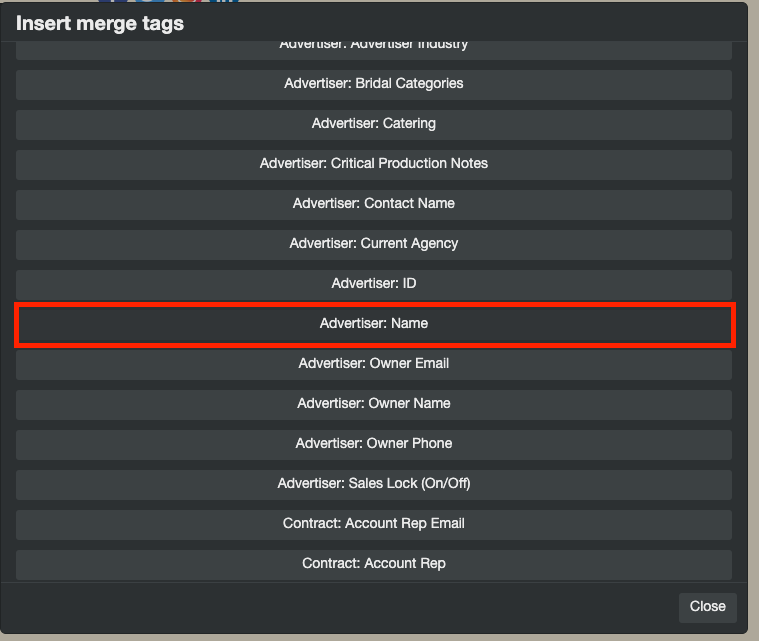
- Your merge tag has now been added.
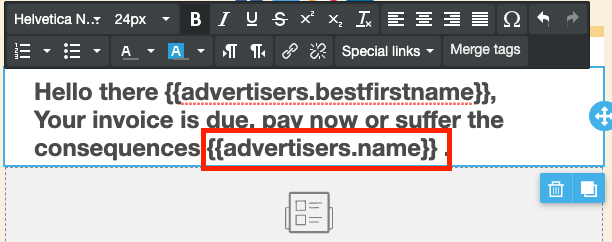
A note about merge tags
Merge Tags used to be denoted with a # sign instead of the brackets { }.
If you have been an Ad Sales Genius user for a long time, your previous email templates will have mostly converted to the new system but in the event that they are no longer compatible you will see this icon:

Click Options and Edit to go into the template and change the incompatible tag.
Save your Email Template
When you are satisfied with your email template, click the Save button in the upper right-hand corner to save your changes.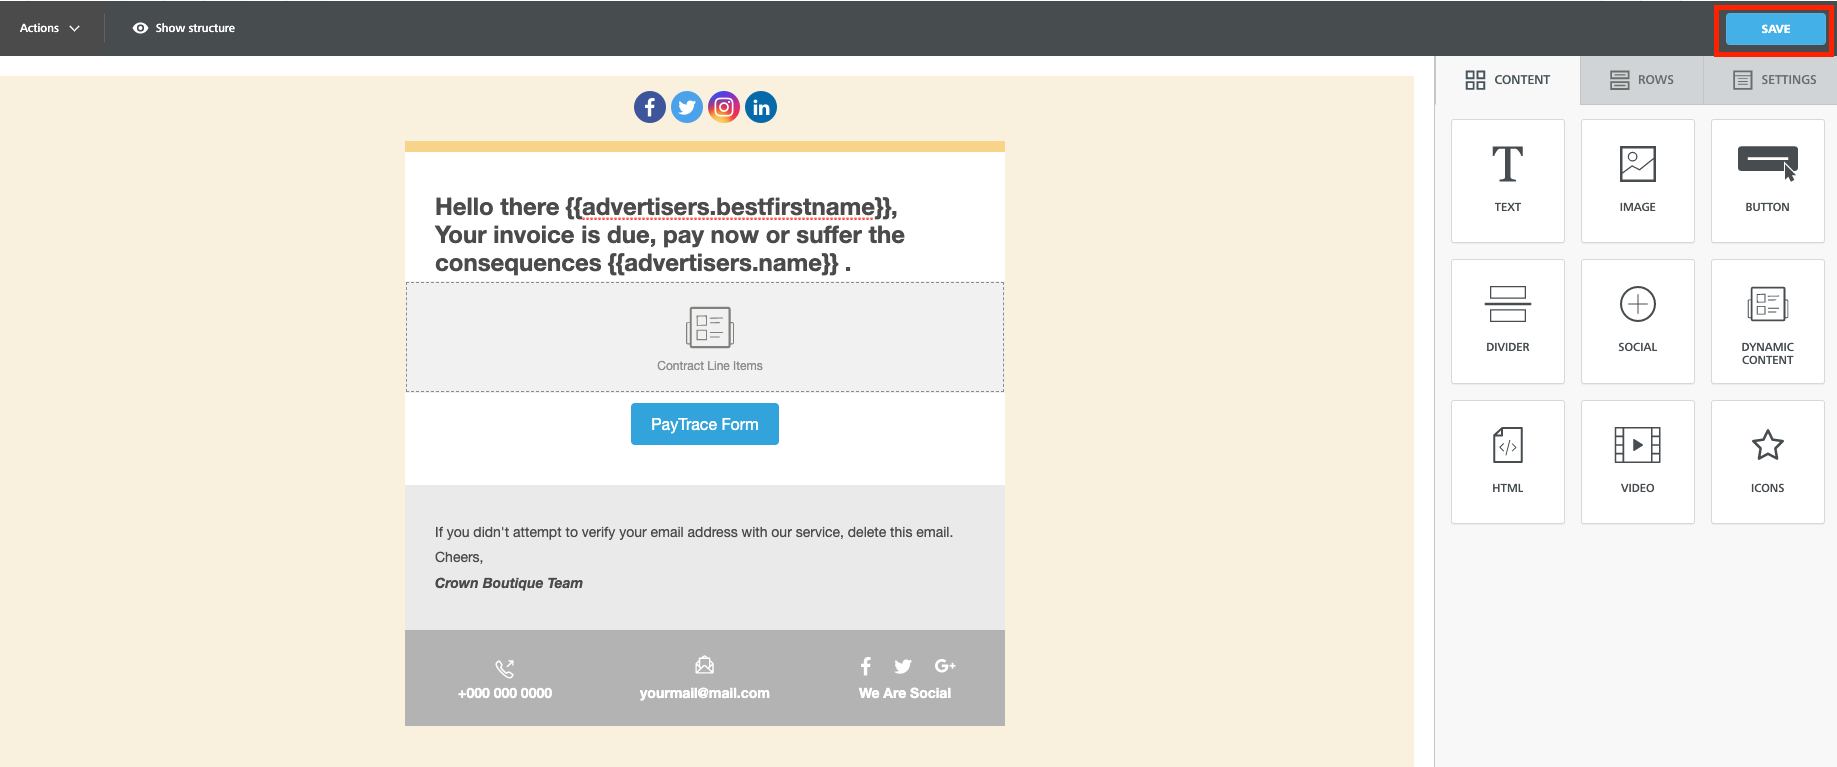
Once you save your template, you will see the Template Details window where you can name your template, designate the reply to name and email, provide a subject line, and choose the sharing options.
You can also access the details view by clicking Options > Edit Details on an existing Email Template in the Email Newsletters window.