- Create a new template. Go to: Marketing > E-mail Templates > [+New Template] > Line Items
Note: it is crucial that you choose the Line Items template, as this specifies that you will access the template through the Delivery > Line Items report - Choose an available Template
- The content is structured in rows, so you can either edit the content within the rows or you can delete the row altogether by hovering and clicking the
 icon and then the
  icon
icon - Add a content (Text, Images, Buttons, Dividers, Social Media Buttons) by clicking + holding + dragging the corresponding tile from the CONTENT tab onto the email template

- CONTENT tab - A list of all the content types you can drag and drop onto the template. You can drag and drop these to anywhere on the template.
- TEXT - This content box allows you to type in custom text. This is also the content box you will need for inserting .
- IMAGE - How to insert an image onto your contracts.
- BUTTON - If you want to add a button for a call to action.
- DIVIDER - A line to break up areas on your template.
- SOCIAL - Add icons with links to your social medias.
-
The rows allow you to drag and drop blue, empty boxes onto the template. You can then toggle over to the CONTENT tab and drag and drop the various content into one of the blue boxes. The purpose of the rows is to establish a layout within your template.

For example, if you drag and drop the last set of Rows onto the template, you'll have four open boxes ready for content placement.

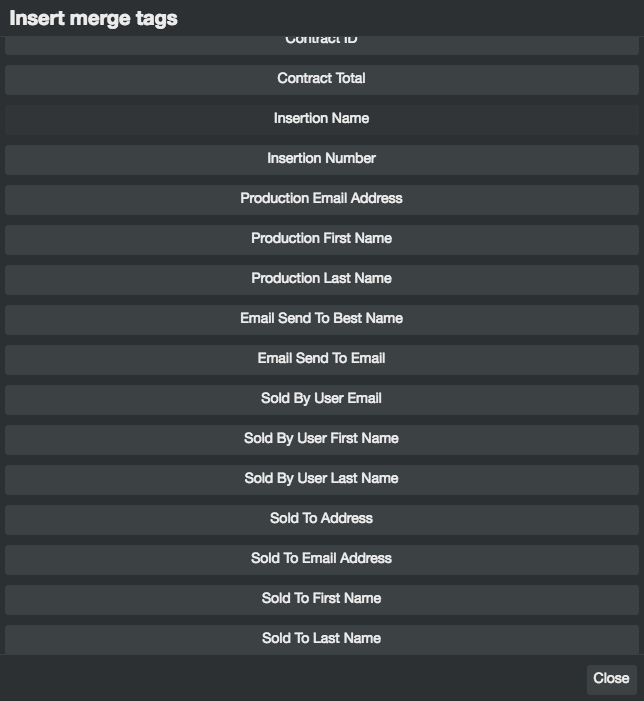
- Add the body of the email in a Text content area, providing details regarding the line item you are referencing; you can utilize Merge Tags to pull in data from other areas of the system including First Name, Last Name, Line Item Name, Line Item Number, etc.
- To obtain the Merge Tags, click on existing text within the body of your email so that the text editor pops up

- Click on Merge tags to view a pop-up of all the options

- Now that your template has the verbiage you want with the merge tags embedded, you're ready to send out your mass email
- Navigate to Delivery > Line Items and filter down to establish the list of customers/Line Items you want to send an email to
Note: if a customer appears multiple times within the report, they will get a separate email for each occurrence - You can either include all customers displayed in the report by checking none of the boxes, or you can manually check the boxes to choose specific customers
- Click the Batch Action dropdown and select Email Campaign
- Type your Campaign Name, click Save
- Once you are directed to the E-mail Templates page, choose the Line Items template you created
- Choose your Send Date and Send Time and click Save Campaign
- You can also click Send Later on this screen if you aren't ready to setup for deployment; this campaign would then sit as Pending under Marketing > Campaigns and allow you to setup deployment at a later time
- You can review the number of Opens and Clicks by navigating to Marketing > Campaigns and looking to the campaign you just sent; when you click on the number of Opens and/or Clicks, it will direct you to the Accounts report where you'll need to click Filter to show the list
Email Templates
