
Ad requests are mini-projects or tickets to track the process of designing an ad on behalf of a customer. Creating an Ad Request in Ad Sales Genius is a quick and easy process. While Ad Requests can be created from the Ad Requests module, this article will walk through how to create an Ad Request directly from a line item order.
To Create An Ad Request From a Line Item
- The first thing we need to do is locate the line item order that we will be assigning the ad request to. Click Delivery using the left-hand navigation menu.

- Click the Line Items tab to see your line items.
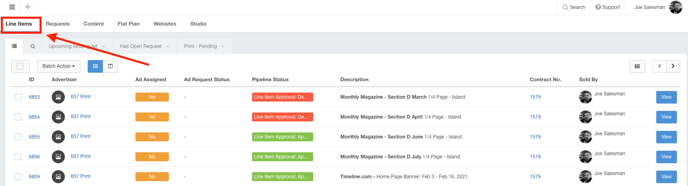
- Locate the line item that you want to create an ad request for and click the View button.

- Click the + Create Ad Request button while on your line items page to display the New Ad Request window.

- Use the Ad Request window to complete the following information:
- Line Item - verify that this ad request meets the correct specifications.
- Assign To - This is the person that will be heading up communication with the client.
- Details - These are additional details to give to the person selected in the Assign To field.
- Send Notice to Assignee - Toggle this switch to on if you want the assignee to receive an initial notification that an ad request has been created.
- Choose the correct Ready for Production option if you want the subsequent proof on the ad request to be marked as production-ready.

- Click the Save button when you are satisfied with your selections.
You can now continue with uploading proofs to this ad request.
Creating an Ad Request from the Requests Window
You can also create a request from the Requests Window. Follow these steps to create your ad request:
- Click Delivery using the left-hand navigation menu.

- Click on the Requests tab to see a list of your current ad requests.

- Click the +Ad Request button to begin creating a new ad request.

- Use the Select Account dialog to choose which account you will be sending the request to. Click the Select Account button when you are satisfied with your selection.

- Navigate to find the Line Item you would like to create an Ad Request for.

- Choose whether you would like to Assign Internally or Send to Studio (Additional Service ASG provides)

- Use the New Ad Request dialog to complete the following information:
- Assign To - This is the person that will be heading up communication with the client.
- Due Date - This is the date that the ad request is due.
- Headline Copy - This will be the headline of the content that is being requested.
- Supporting Copy - This is the content that you would like in your article.
- Instructions - Here is where you can provide detailed instructions on the content that you are in need of.
- Send Notice to Assignee - Toggle this switch to on if you want the assignee to receive an initial notification that an ad request has been created.
- Related/Reference Ad - Select an ad from the account's ad library to use as a reference for the new design
- Click the Save button when you are satisfied with your selections.
