
The checkout feature allows customers to buy configured products directly from their user portal. To configure this feature, you must first enable checkout for your system, then configure the product, ad size, ad rate, issues, and sections for sale.
This article will discuss how to enable checkout and take you through the steps of previewing what your customer will see when they access their portal.
To Enable Checkout
The first thing you will need to do is ensure that checkout is enabled for your system.
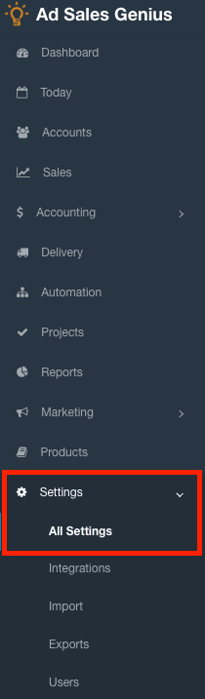
- Click Settings > All Settings from your left-hand navigation menu.
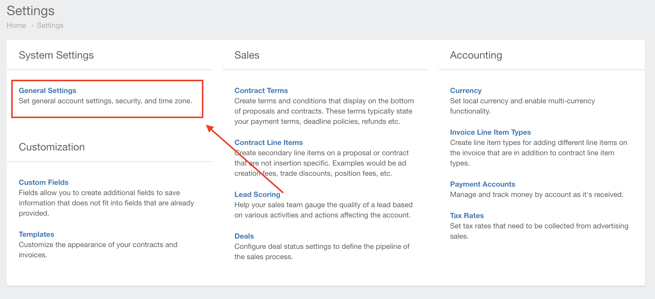
- Click the General Settings link to display your system settings.
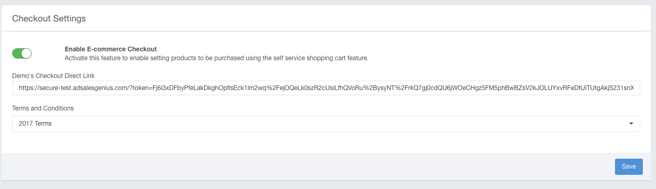
- Toggle ON the Enable Checkout switch found under the Settings > All Settings > Checkout Settings header.
-
- This is also where you obtain your direct checkout link to embed or add in emails.
Note: You can also find the link to the account's checkout page by clicking the details tab of the account. - You can also choose which Terms and Conditions you would like applied to checkout sales.

- This is also where you obtain your direct checkout link to embed or add in emails.
- Click the Save button when you are satisfied with your selections.
Enable Checkout For Your Product
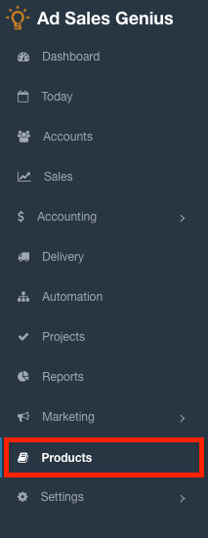
- Click the Products link using your left-hand navigation menu.
You can tell if a product is Checkout Enabled by looking at the Checkout Enabled column.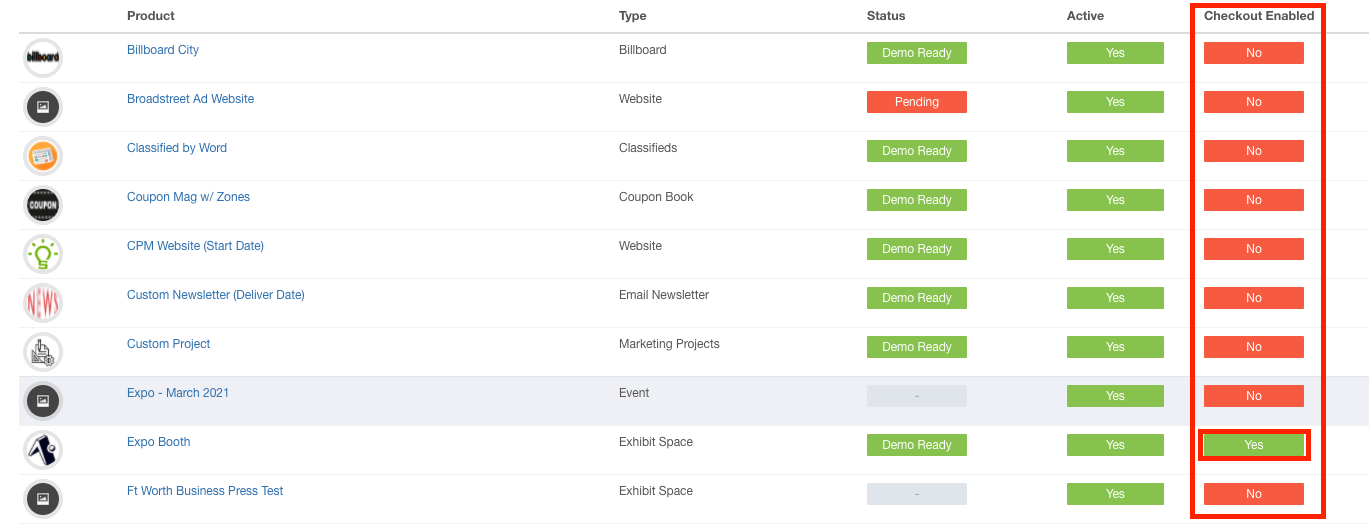
If you do not see the Checkout Enabled column, click the Filter Columns button and ensure the check-mark is selected.
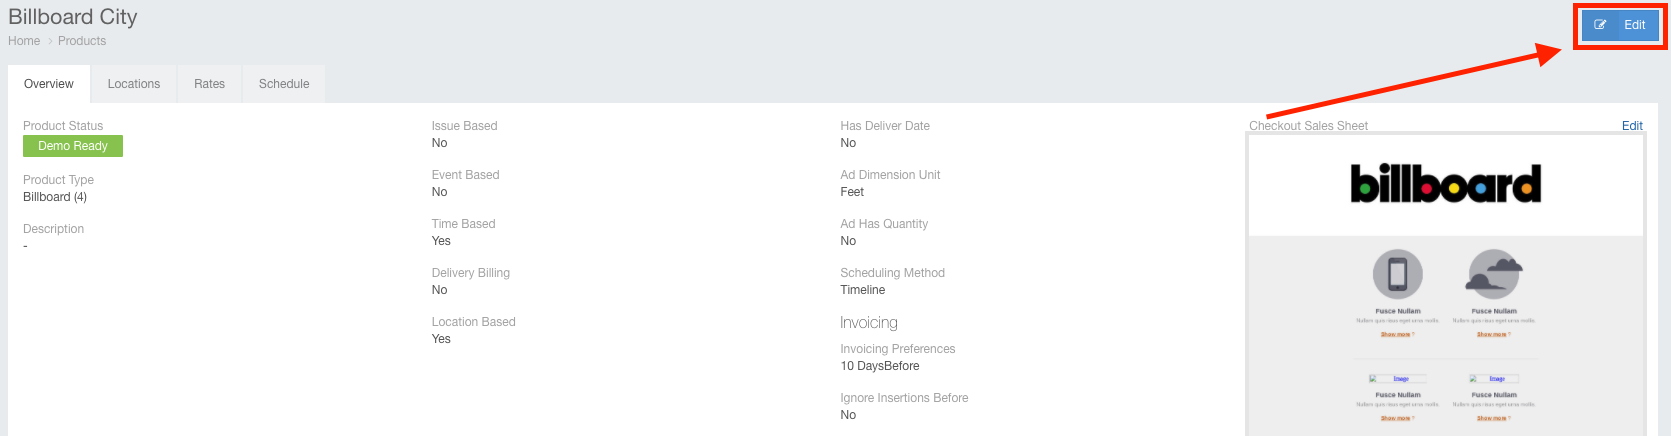
- Click the View button for the product you would like to add to Checkout.

- Click the edit button in the upper right corner of the product page.
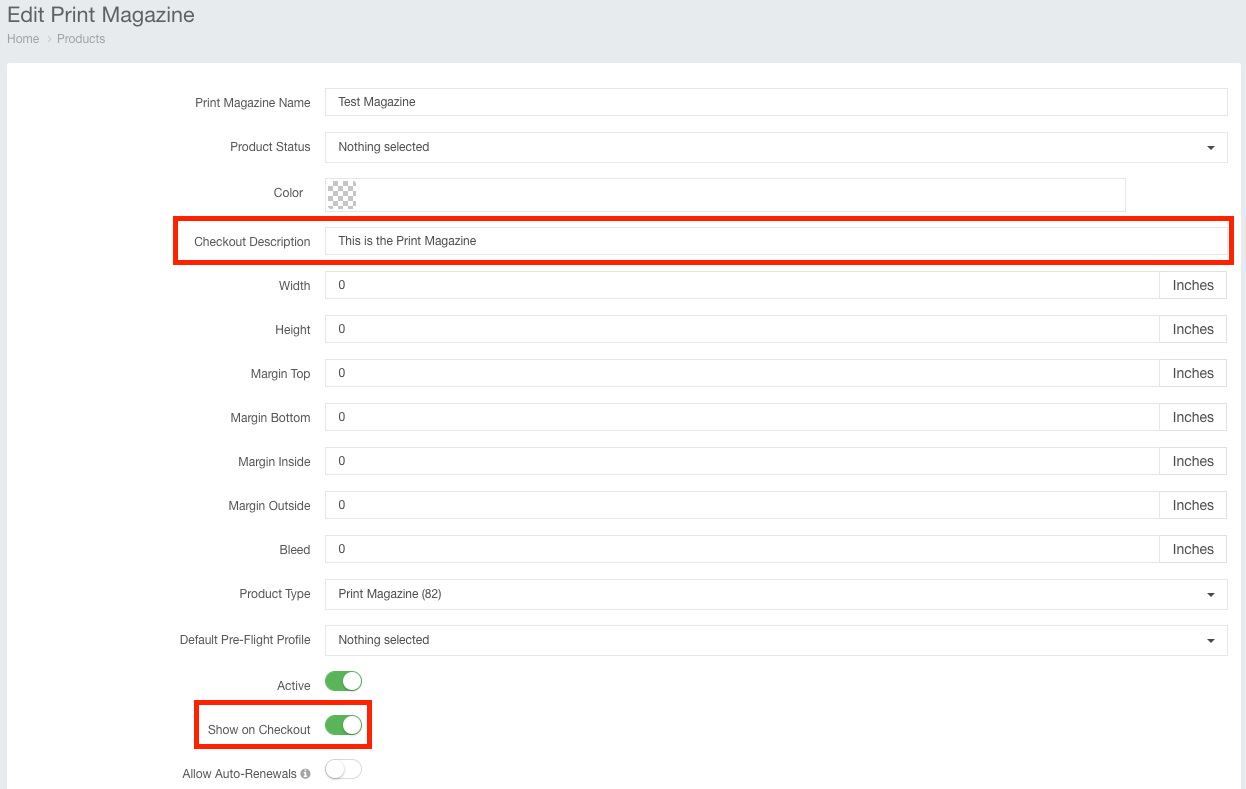
- On the Product window, add a checkout description for your product. This is what will be shown to your customer on the Checkout page.
- Toggle on the Show on Checkout button to turn this product on in Checkout.
- You must also enable every applicable component within that product, including:
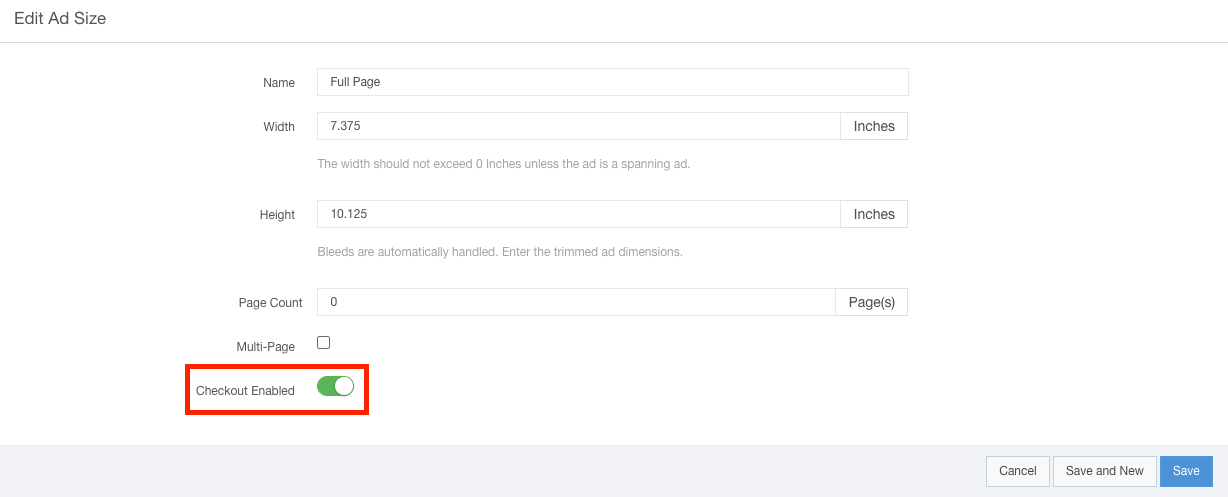
- Ad Sizes - Click the Edit button next to the ad size you want to enable. Then toggle the Checkout Enabled switch to the On position.

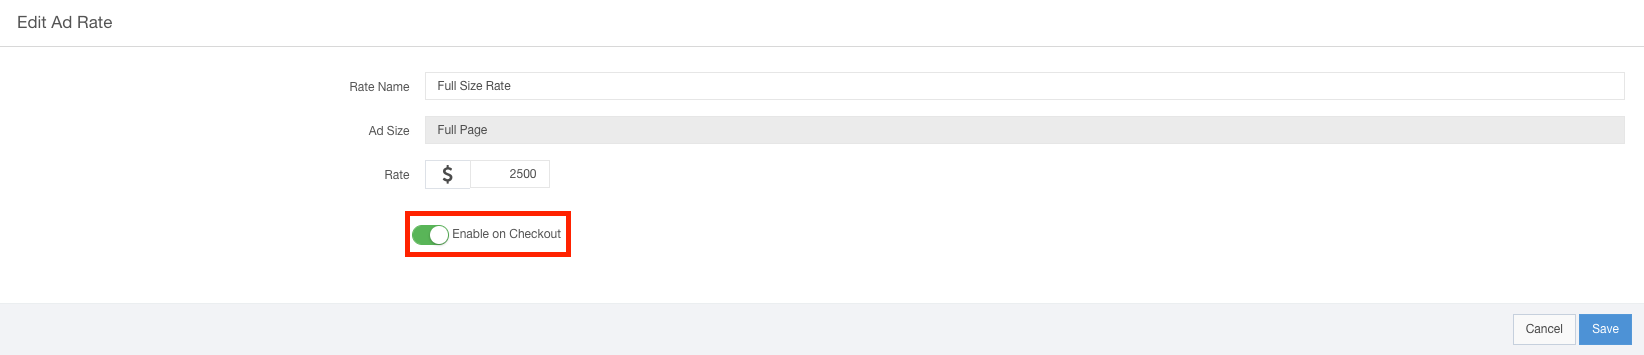
- Ad Rates - Click the Edit button next to the ad rate you want to enable. Then toggle the Checkout Enabled switch to the On position.

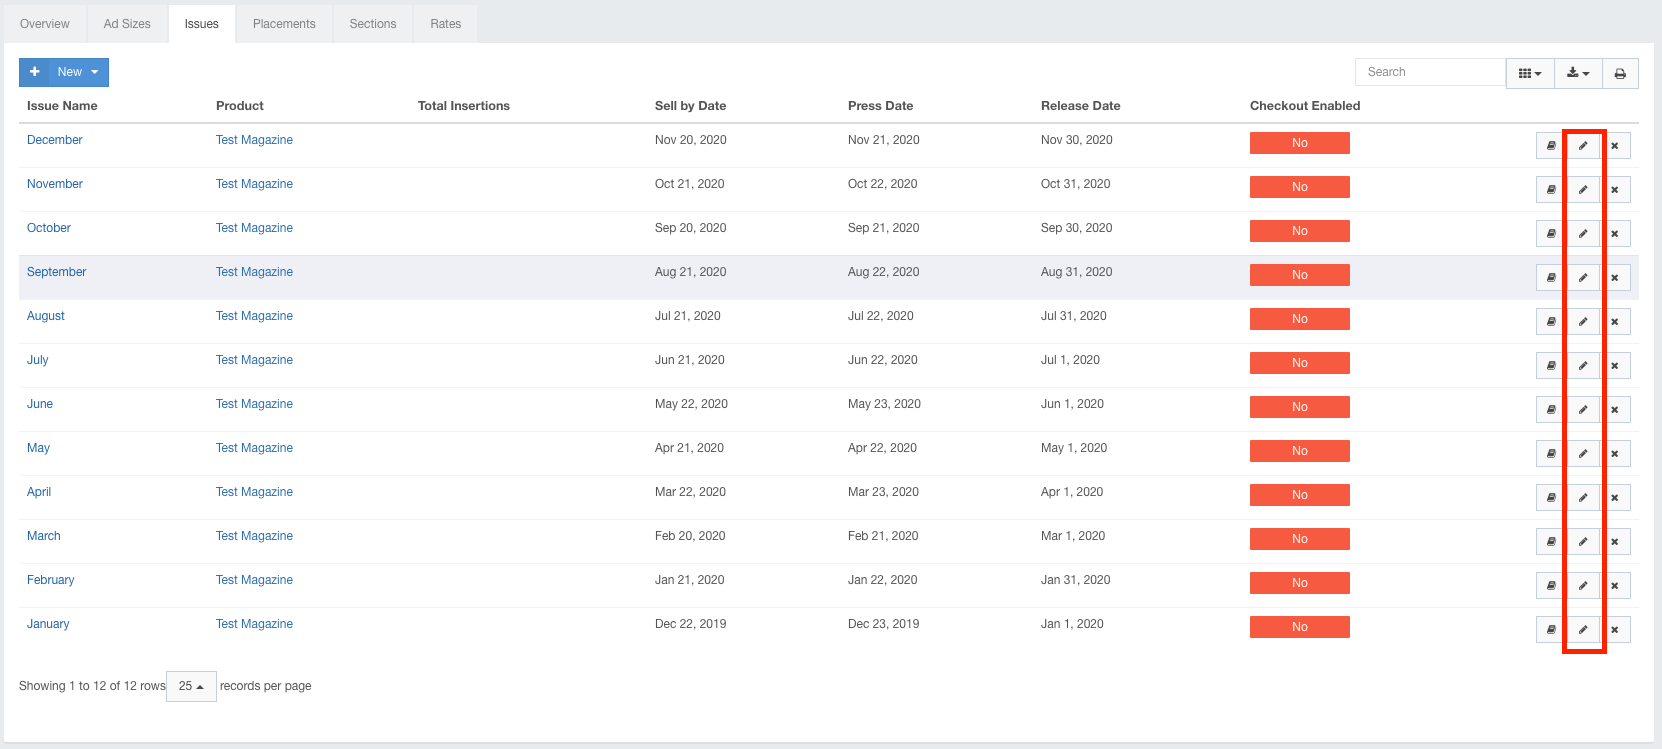
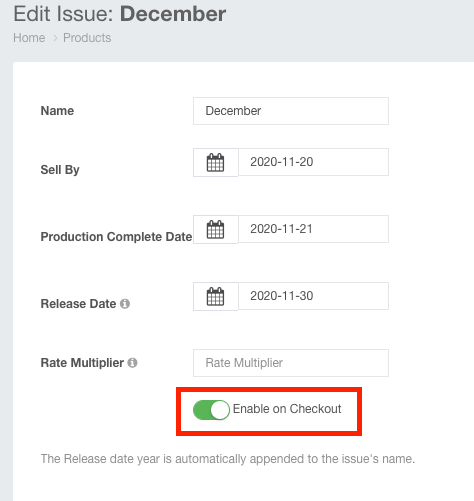
- Issues - Click the Edit button next to the location you want to enable. Then toggle the Checkout Enabled switch to the On position.
- If you are using Sections or Locations you will want to also enable checkout for each of these components by following the same steps: Click the Edit button next to the appropriate component. Then toggle the Checkout Enabled switch to the On position.
- Ad Sizes - Click the Edit button next to the ad size you want to enable. Then toggle the Checkout Enabled switch to the On position.
Setup Your Sales Sheet
You can add a Checkout link to your emails that you send your customers.
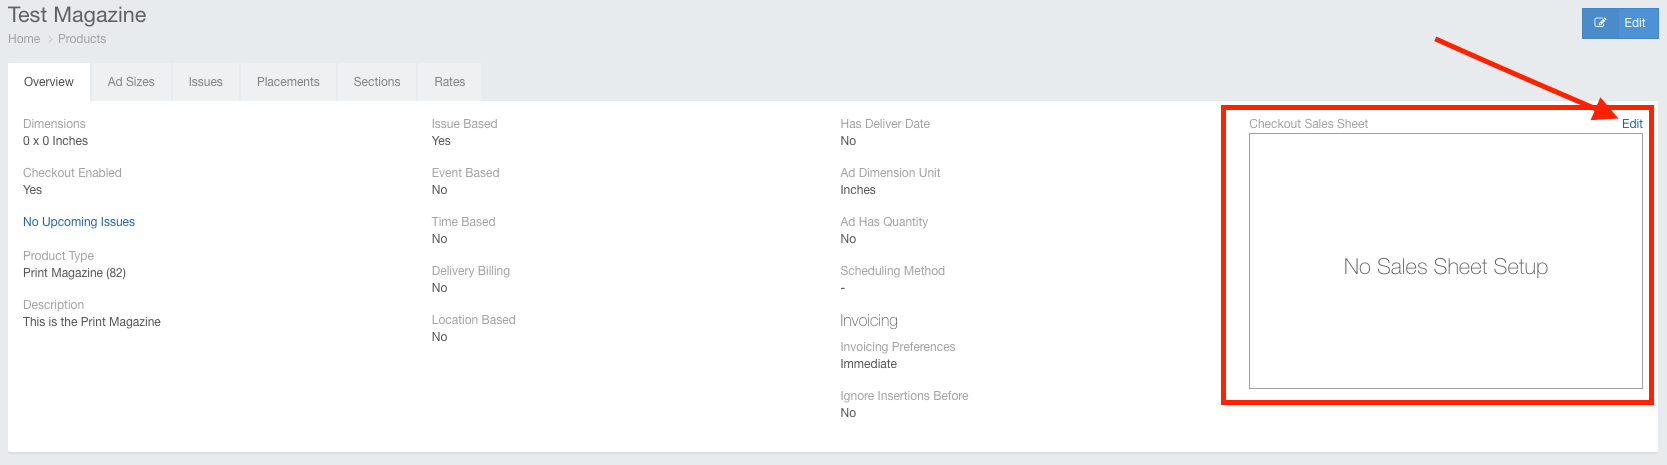
- Navigate back to the Overview tab of your product
- Click the edit hyperlink on the Checkout Sales Sheet to update what your buyers see when navigating to your checkout page online.
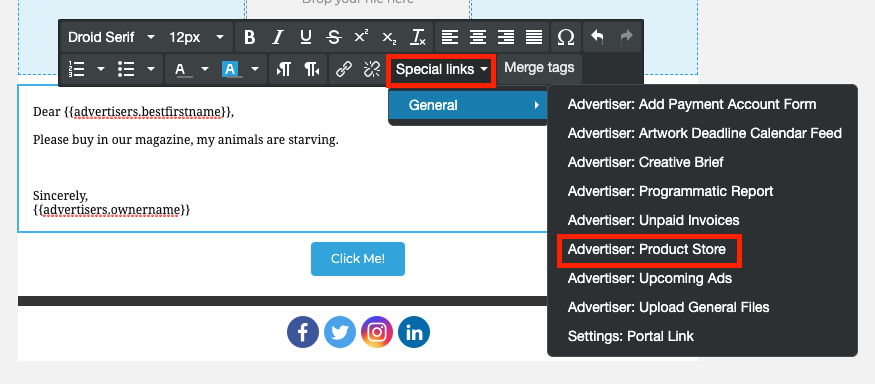
- Configure your email templates to include the Advertiser: Product Store link. This is the same platform used when editing Marketing Email Campaigns. You can drag and drop content, add images and embed buttons
What the Customer Will See
Now that Checkout is configured, you can view the customer portal to see what will appear for your customers.
If the account already exists within Ad Sales Genius, you can send them the link to their own checkout site.
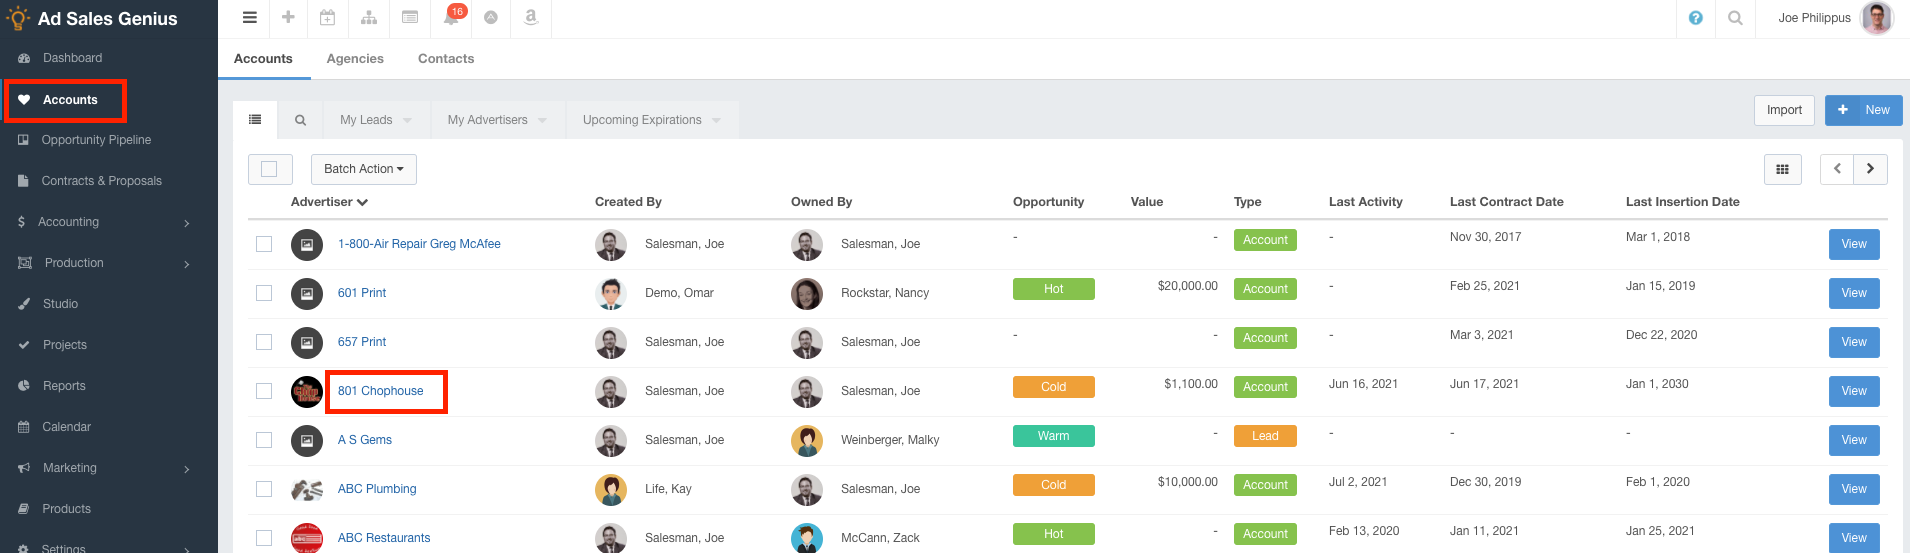
- Open an Account page by either clicking Accounts from the left-hand navigation menu, then clicking on an account or by using the magnifying glass at the top right corner of the screen and searching for the account.
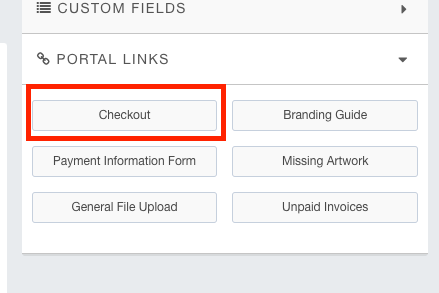
- Click the Portal Links section on the account's page.

- Click the Checkout button to copy the E-Commerce Checkout link onto your clipboard.
The customer will see their personalized Checkout page where they can select from the configured products.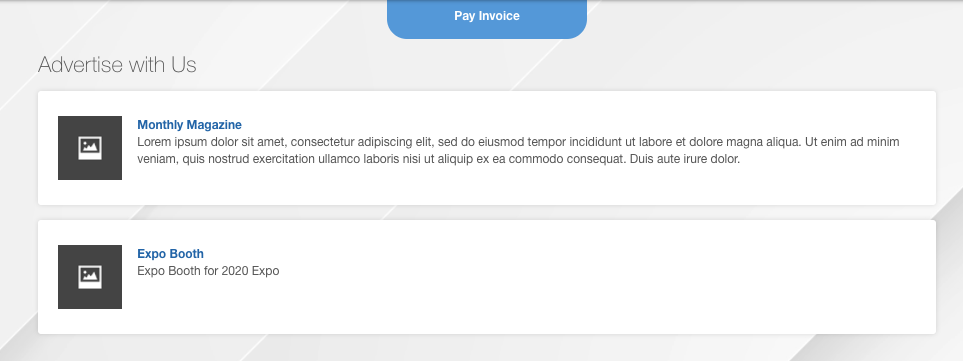
When clicking one of the products, they will see a window allowing them to choose which ad size, rate, section, issue, etc. they would like for purchase. When they are satisfied with their selections, they will click Add to Cart.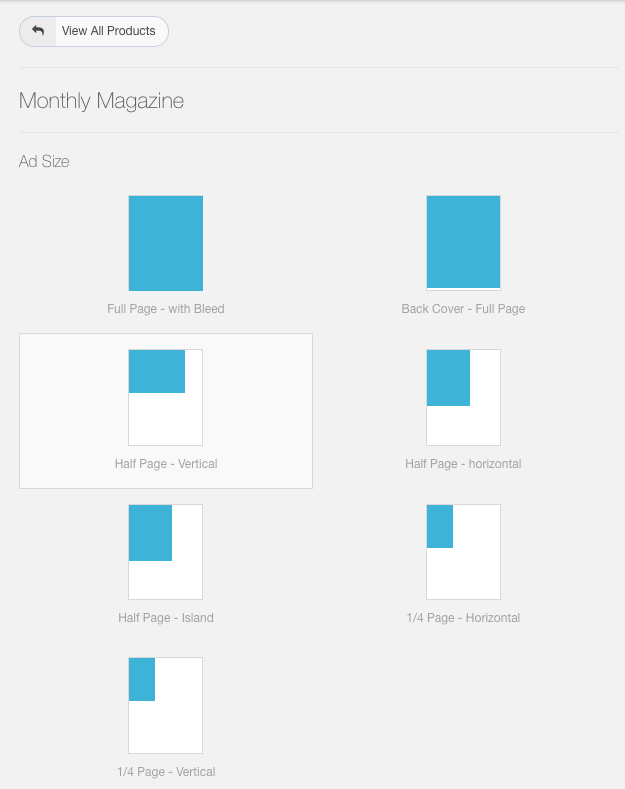
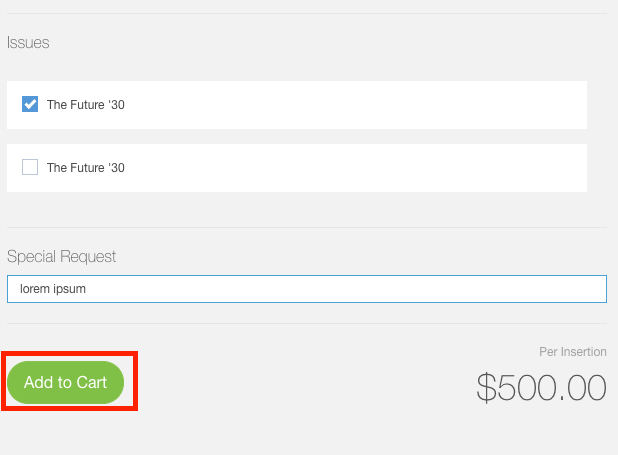
The customer will be given an option to continue shopping, or if they are finished, they can proceed to checkout.
At this point, the system will take the customer through the remaining steps of setting up their contracts, this includes digital signing.
Note: Using online checkout requires a down payment of 100%. 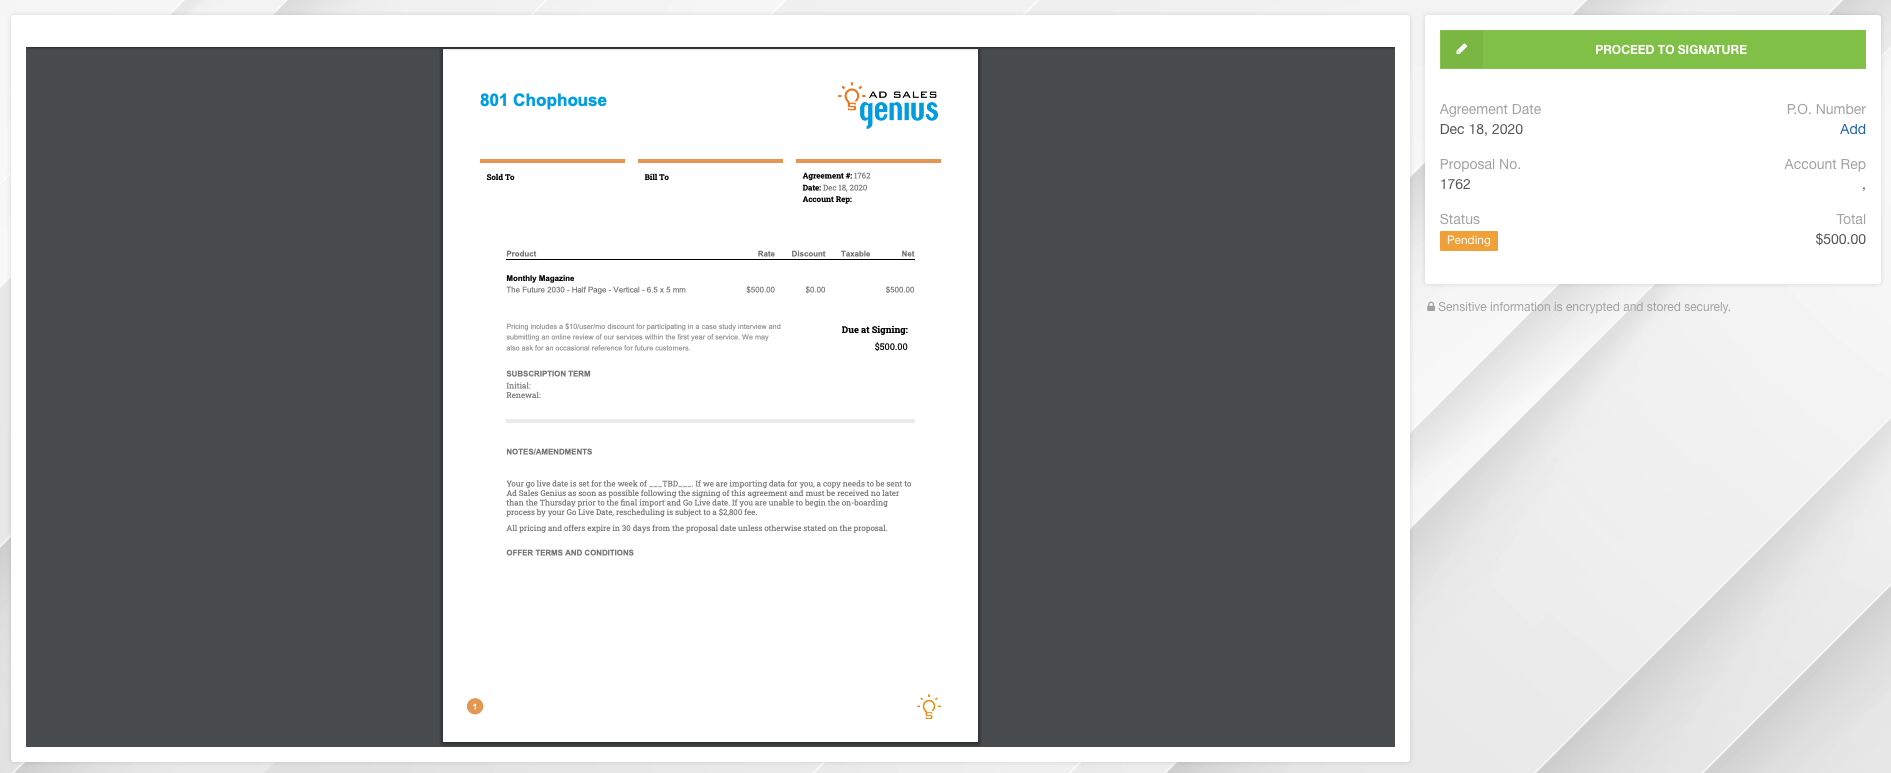
- NOTE: Once your customer adds these items to the Cart, a proposal will simultaneously be created for their account in Ad Sales Genius. Even if the buyer abandons their cart, the proposal will remain in their account in the system, allowing a sales rep to follow-up if necessary.
You will receive a notification in Ad Sales Genius for this sale, and the contract will be marked as Won and handled as a usual contract within the system would be.
Additional Notes
To send emails with the general checkout link, as opposed to the account-specific link, send your correspondence with the link found under Settings > All Settings, then click the All Settings link. Scroll to the Checkout Settings section at the bottom of the screen, and copy/paste the Checkout Direct Link.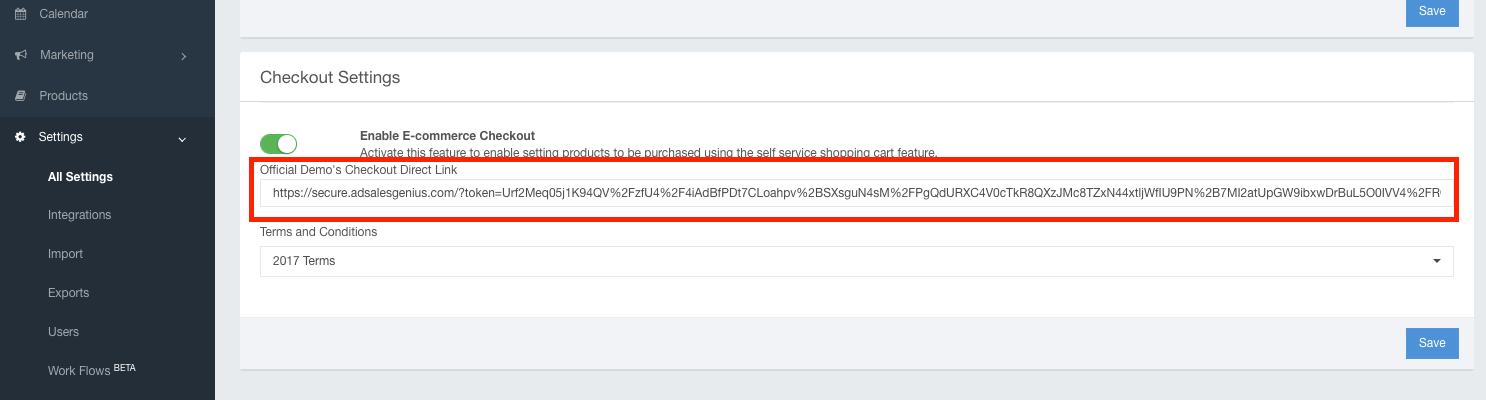
The customer will then be brought to the Online Checkout Registration window where they can input their information.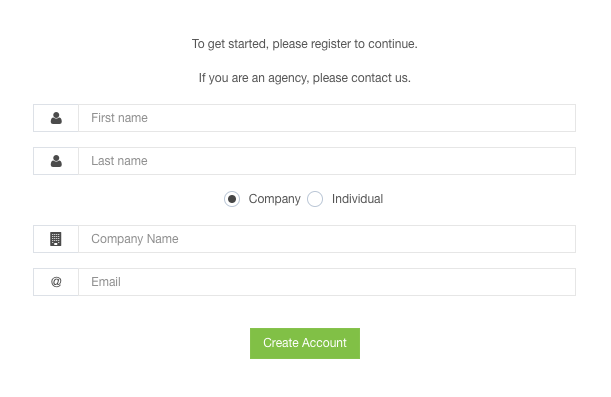
If the email used does not exist within Ad Sales Genius, it will be created for them upon completing this registration.