
Booking Location-Based Products
Ad Sales Genius has made it easier than ever to book location-based items. This article will walk you through how to add a location-based line item to your contract using the Contract Edit window.
To add a location-based product:
- Click the +Product button using the Contract Edit window.
If this a new contract, you will click this button: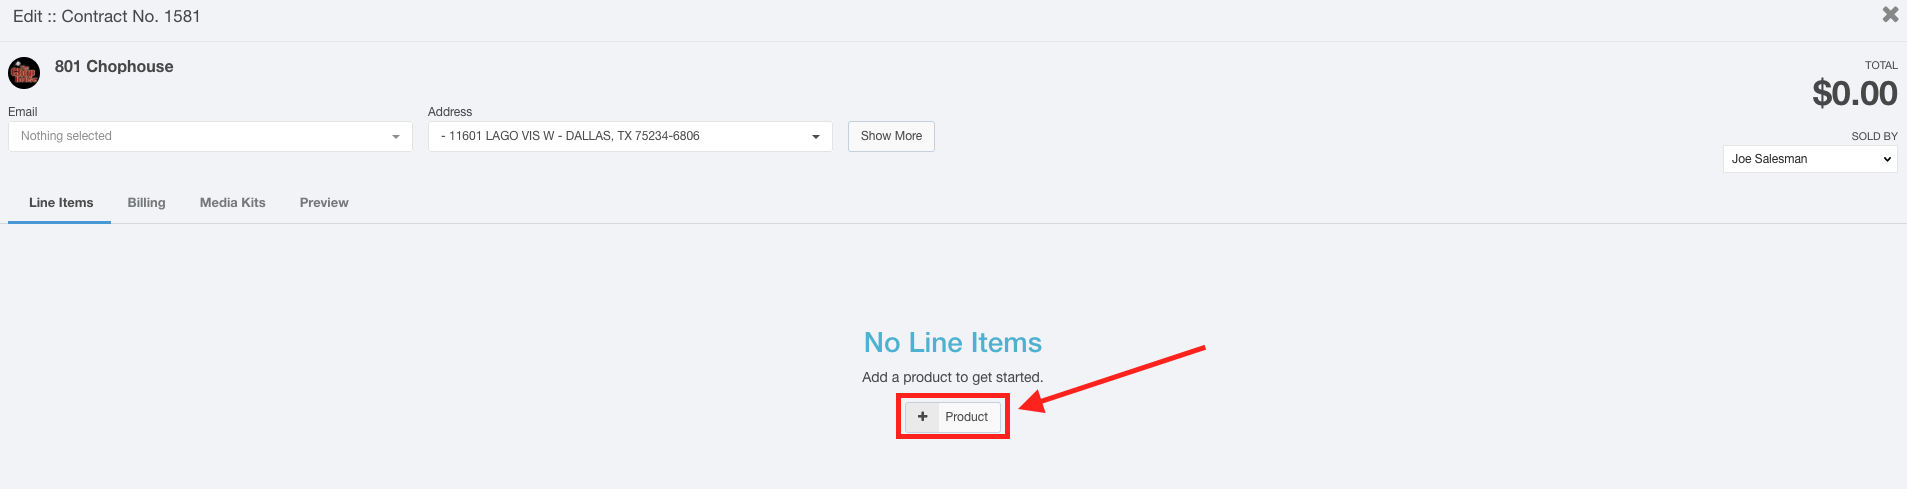
If you already have line items on this contract, you will click this button: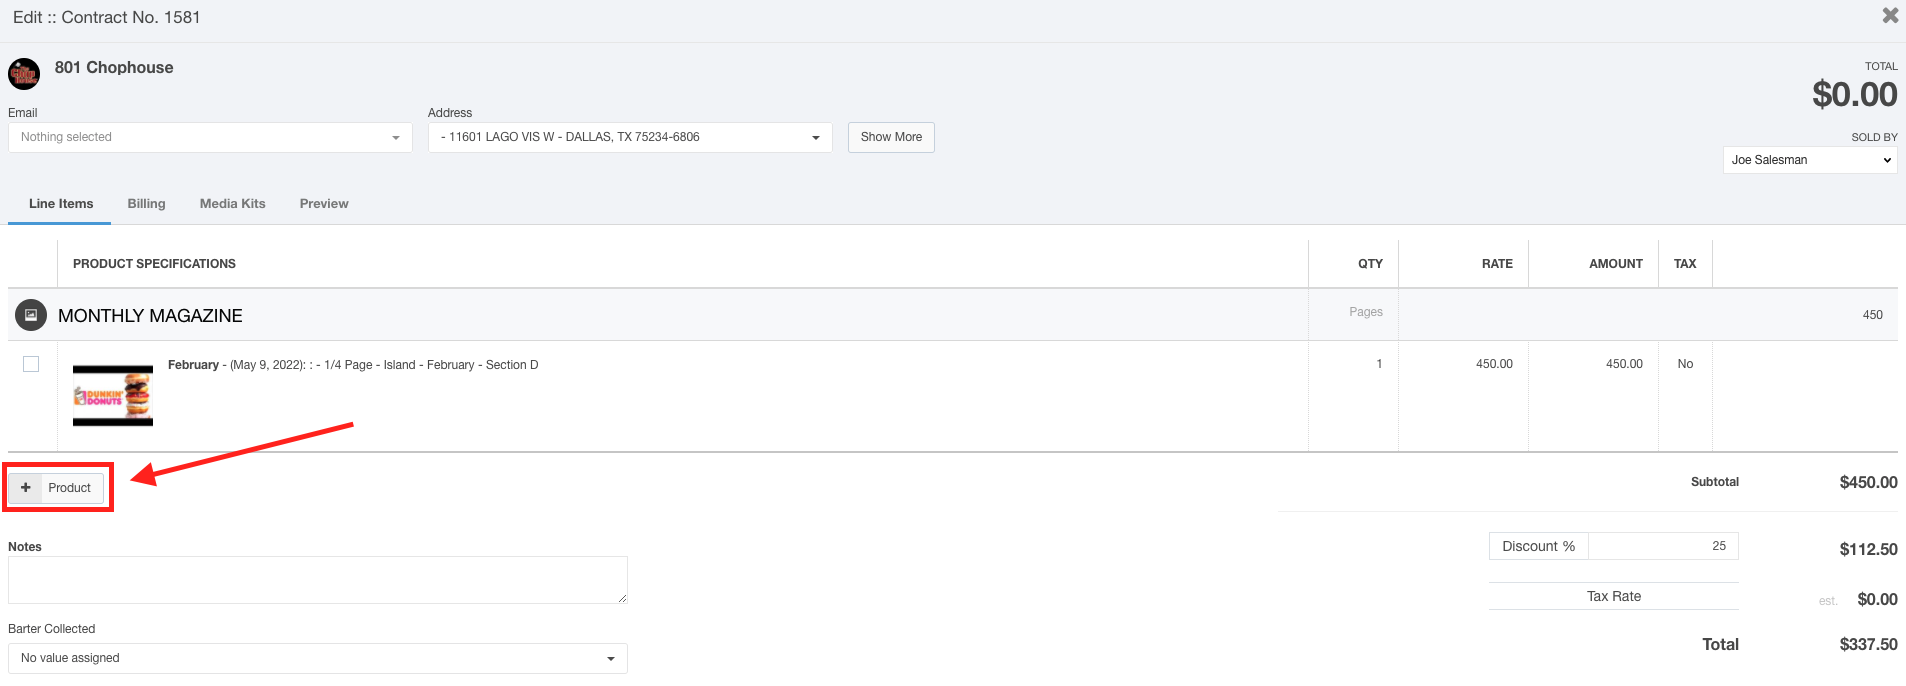
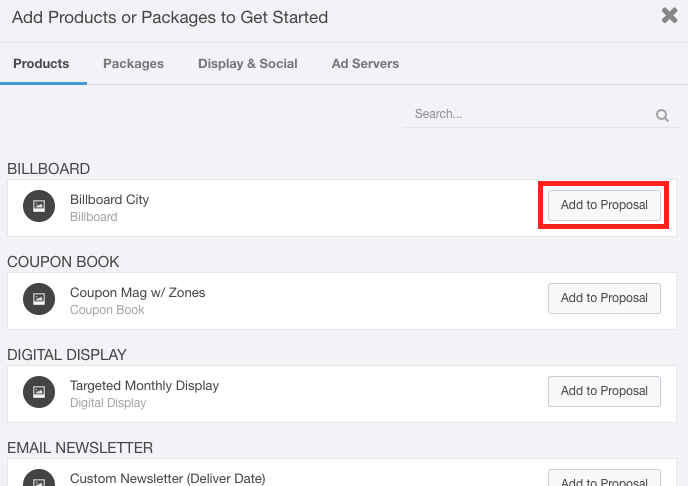
- Choose your location-based product from the Add Products or Packages dialog.
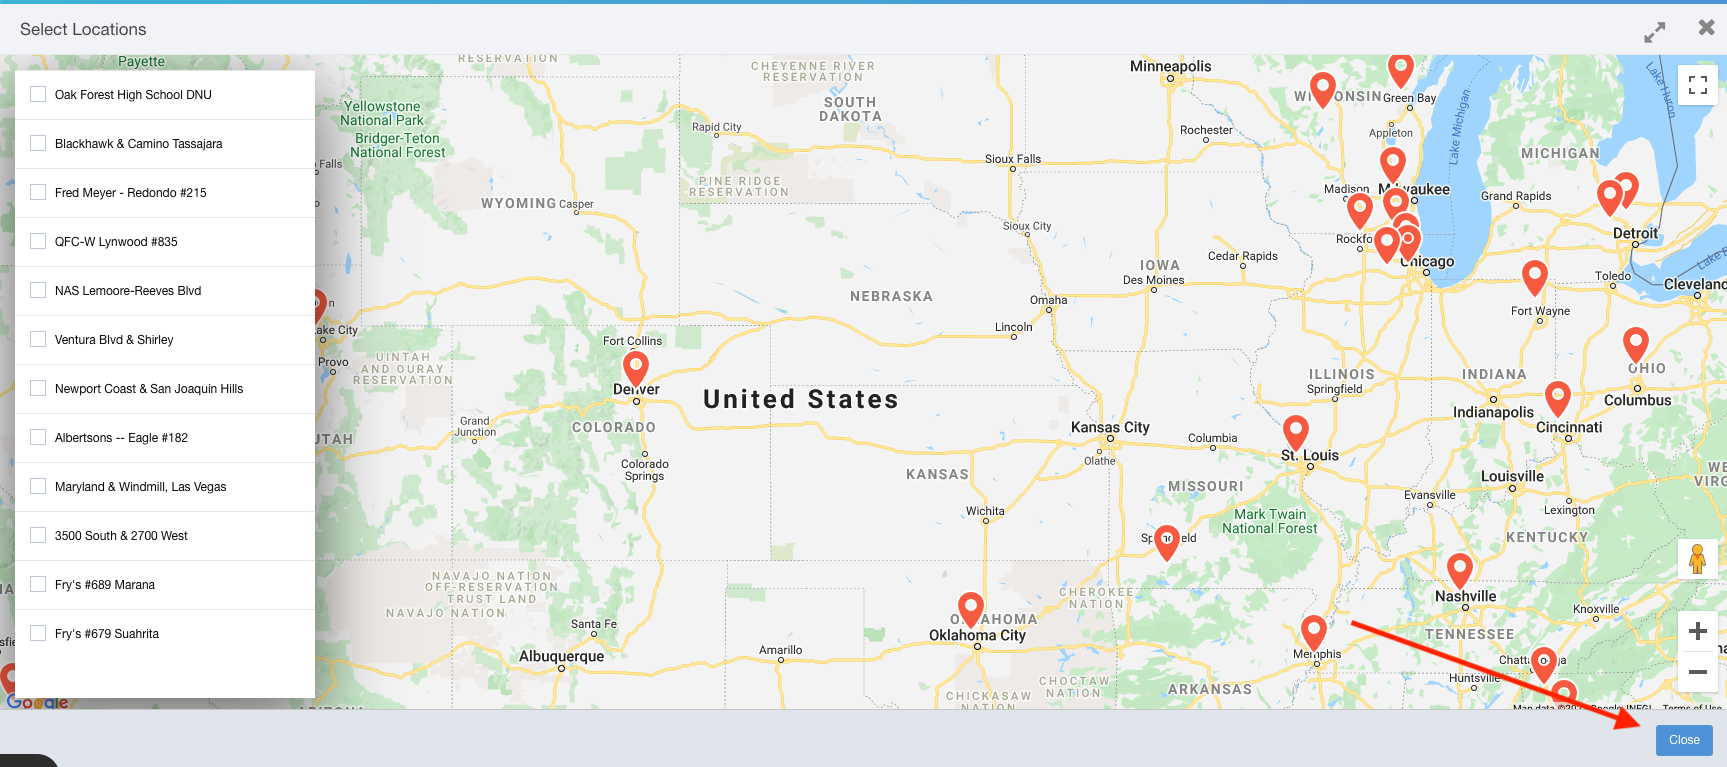
- Click the Location field to display the Select Locations dialog:

- Click the Add Custom Description link if you would like this contract to display a description other than the Ad Sales Genius default description.

- Click the Placement Notes link if you would like to add placement notes to this line item.

- Here, you will see a list of each location and where they are located on the map.
Click the checkbox to select your desired location.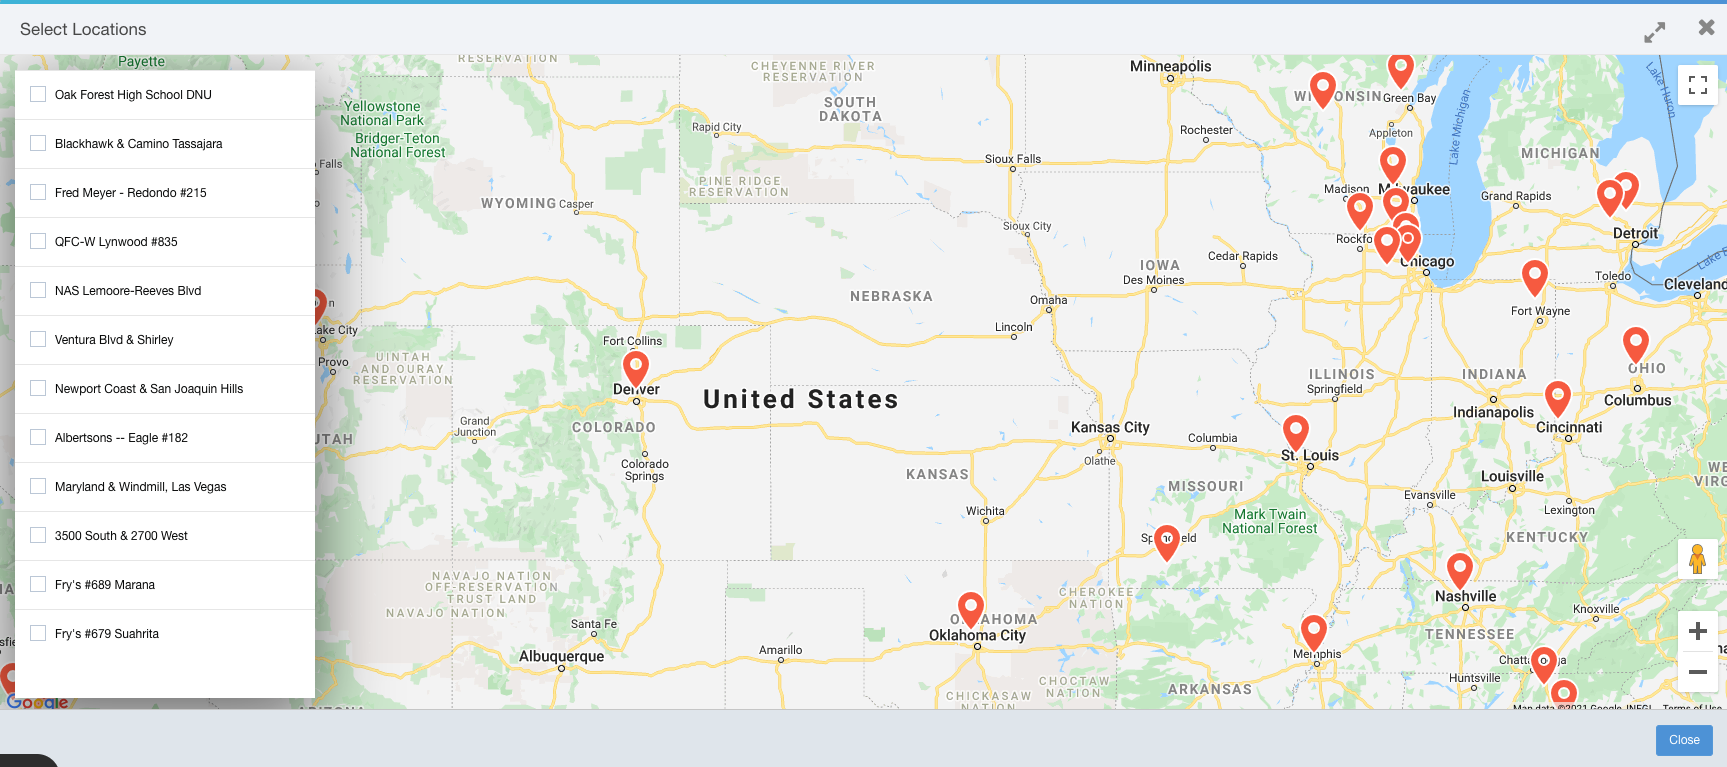
- Click the Close button when you have selected your location.
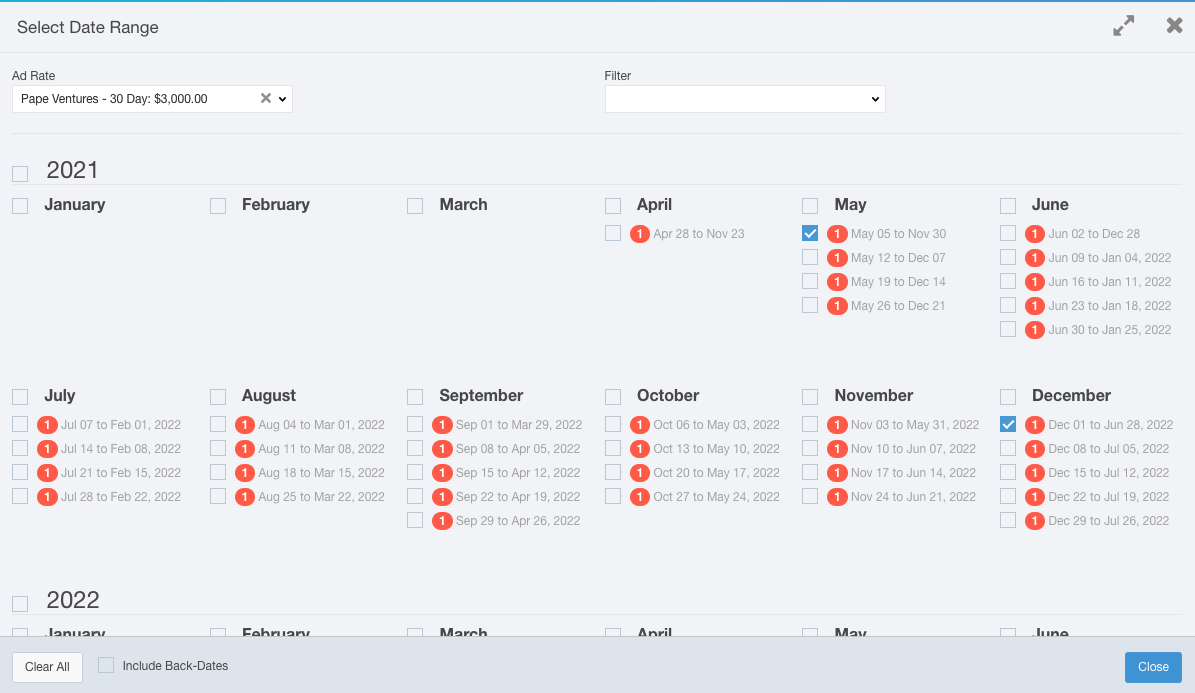
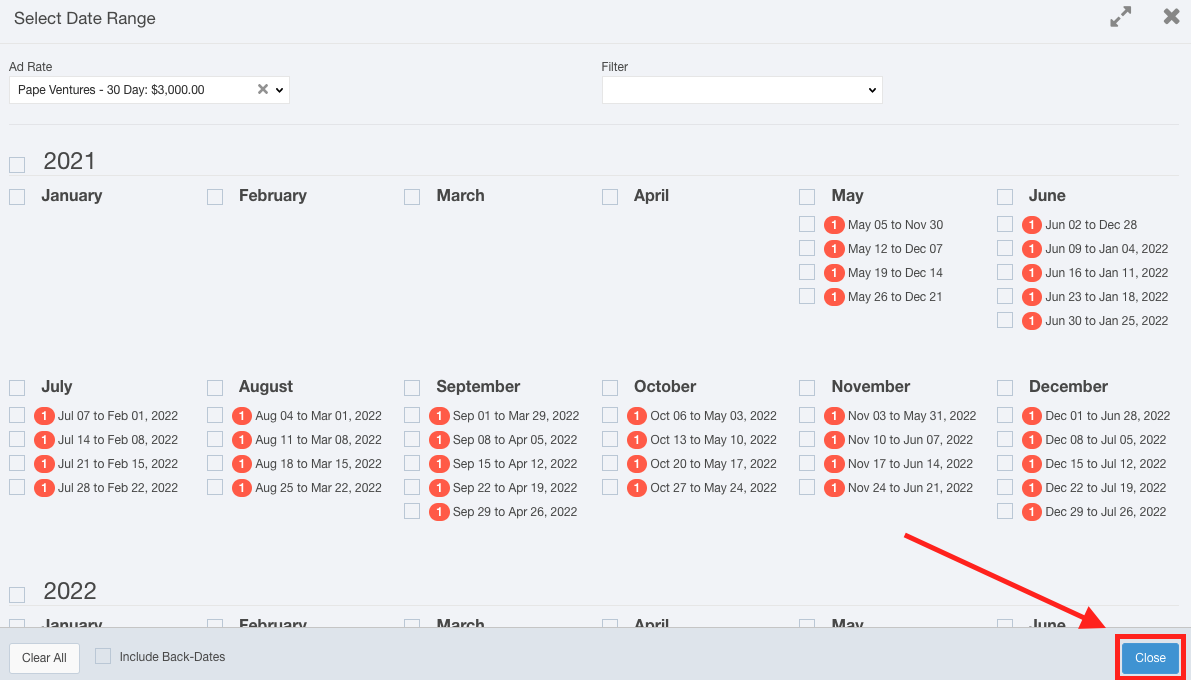
- Use the Date Range field to choose the dates you would like this product to run.
Use the Filter drop-down menu to choose particular days of the week.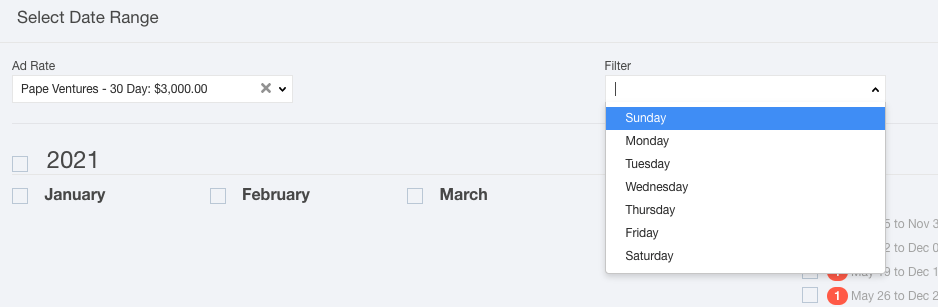
You can quickly change the Ad Rate from this screen by using the Ad Rate drop-down menu.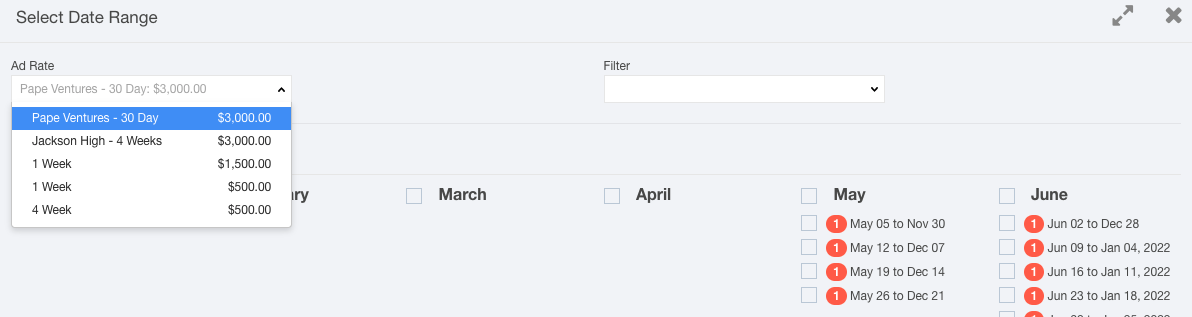
Note: If the date names appear in red, that means that are overlapping: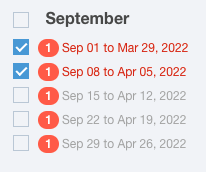
Select the Include Back Dates checkbox if you would like to see issues in the past.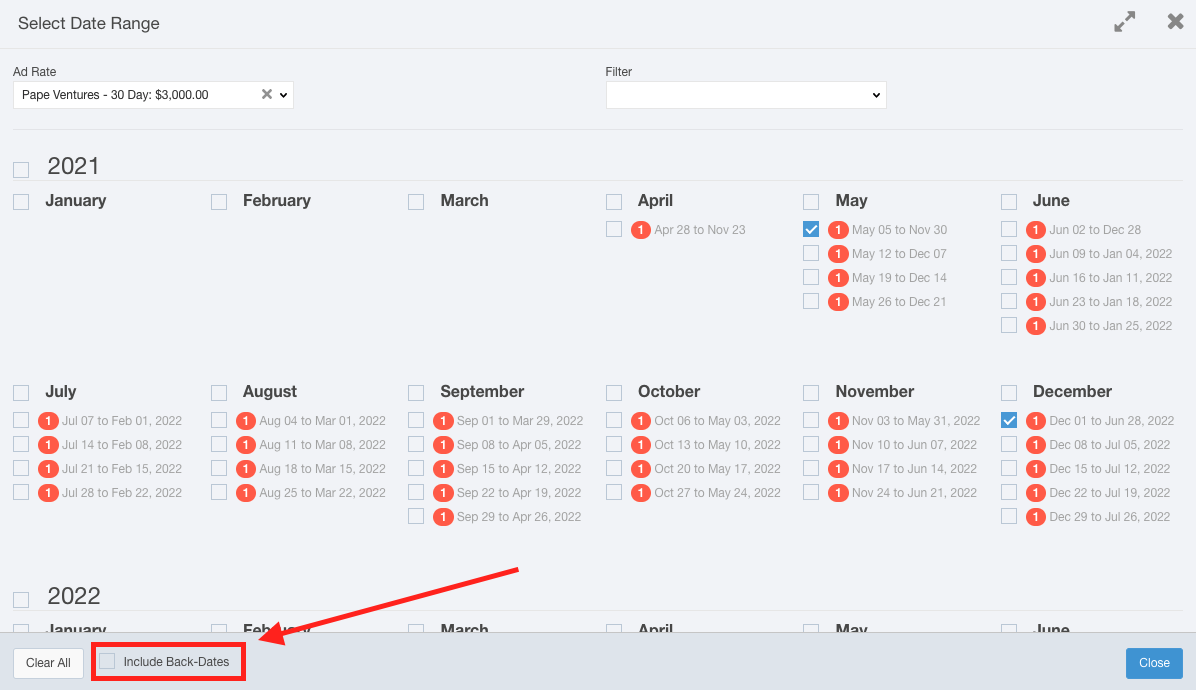
- Click the Close button when you have selected your date range.
- Use the Rate section to select your Ad Rate and any discounts you would like to apply to this line item.

- Click the Add Fees/Discounts to add a fee or discount as a line item.

Note: You can remove the line item fee or discount by clicking the button.
 - Click the Add Line Items button to add the line items to the proposal.

You will see that the line items have been added to the proposal. Click the Close button to close the product options.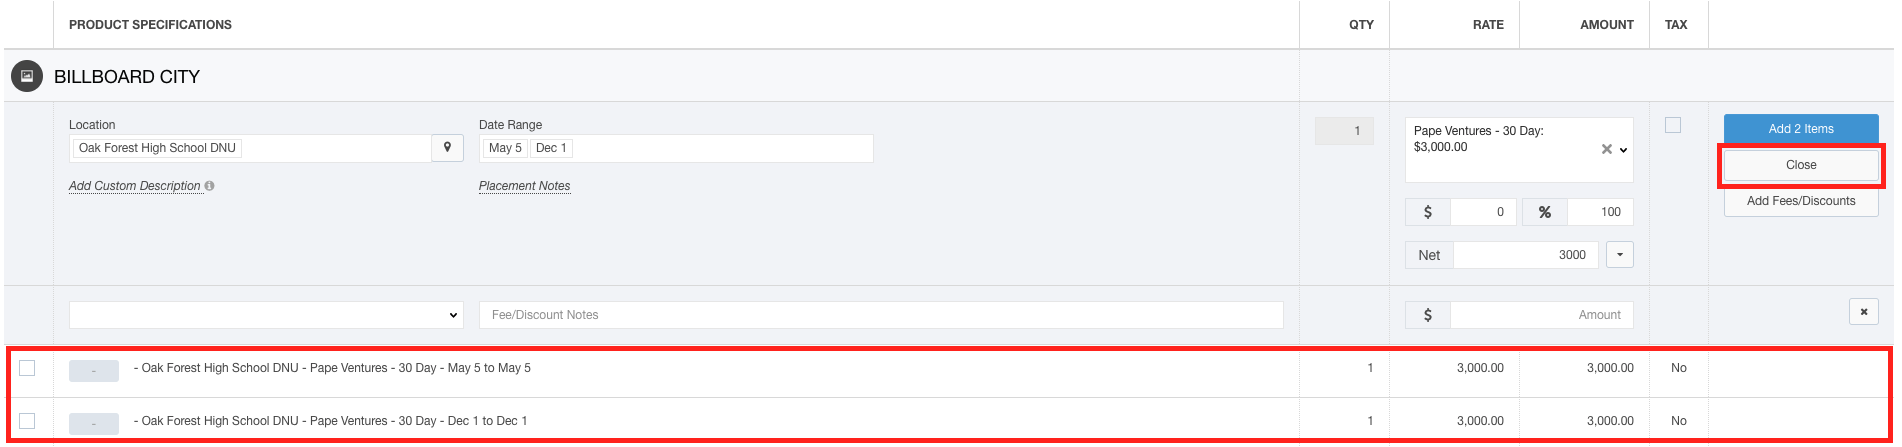
Click the  button on the line item to display the Ad Library where you can assign an ad to this line item.
Hover your mouse over the line item to display line-item specific options.
- Click the
 button to create an ad request or send to Studio Services
 - Click the
 button to display and create any custom fields
 - Click the
 button to remove this line item