Welcome to the new Standard in Digital Ad Service and Analytics. Our highly anticipated ASG Ad Server is your new Comprehensive Advertiser Success Analytics tool.
To access the Ad Server in ASG, go to Delivery and select Ad Server.
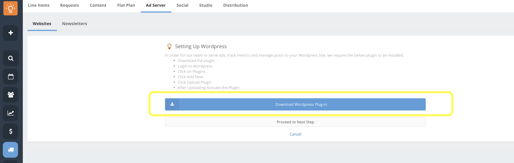
REQUIRED WORDPRESS PLUGIN INSTALLATION INSTRUCTIONS:
In order for our team to serve ads, track metrics and manage posts to your Wordpress Site, ASG requires the WordPress plugin to be installed. From the delivery page under Ad Server, follow these instructions to install the WordPress Site plugin.
- Download the WordPress plugin.
- Login to your Wordpress account.
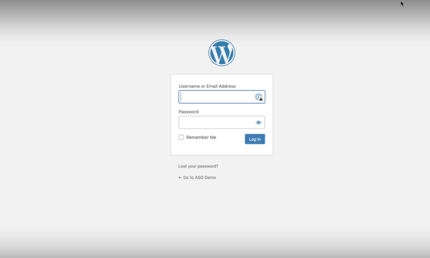
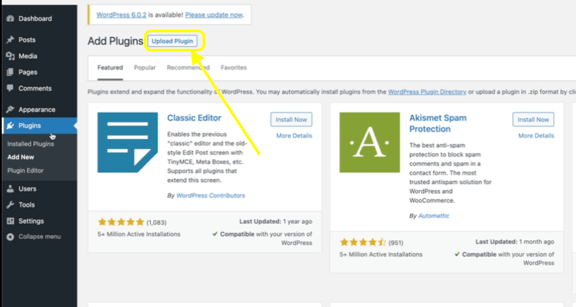
- Click on Plugins then select Add New

- Click Upload Plugin
- After the plugin is uploaded, select the Activate button to finalize the installation process.
NEXT STEPS:
With the WordPress plugin installed, head back to ASG and select Proceed to Next Step.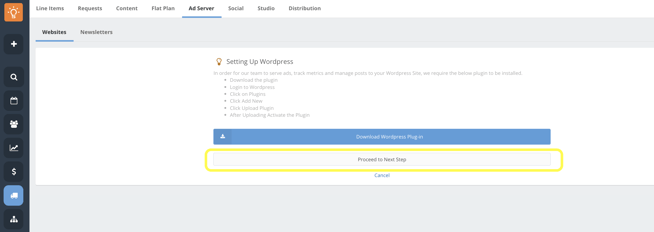
- Type in the name of your WordPress site in the Name section and enter the WordPress URL. Then, enter your WordPress username and password.
-
- 💡Best Practice: Since Admin permissions are required to connect, we recommend creating a unique Admin user specifically for logging into WordPress
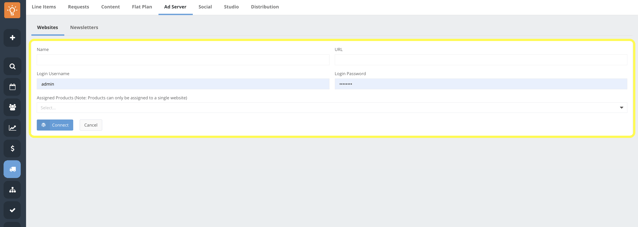
- NOW, assign your product(s) by selecting the Assigned Products dropdown and clicking the box next to the product. NOTE: Multiple products can be assigned to one website. However, one product cannot be assigned to multiple websites.
- Select Connect and then the red Confirm button to acknowledge the website fee or select Cancel to not connect and not be charged.

Assigning Products & Connecting Website Video
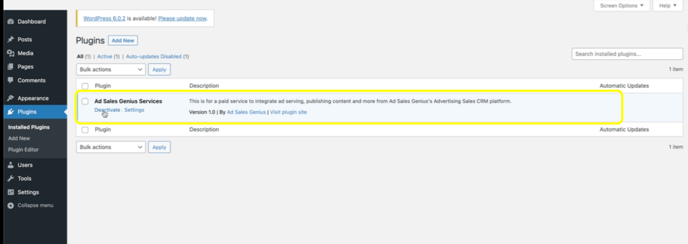
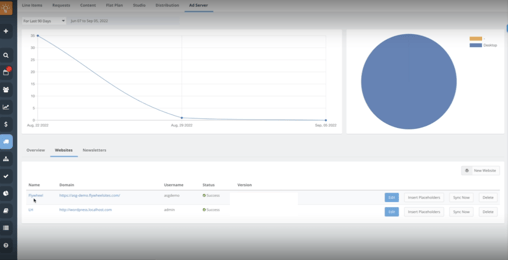
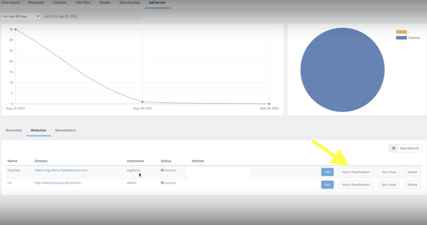
- Once connected, your websites will appear like below:
Experiencing Connectivity Issues? If you are unsuccessful connecting your website, check to make sure your WordPress REST API is enabled using this KB article: WordPress REST API status. NOTE: Additional fees apply when ASG support is requested for troubleshooting connectivity issues. Thank you for understanding.
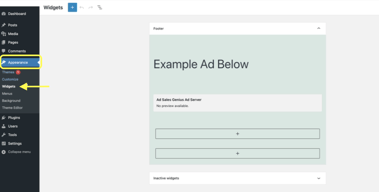
INSERT PLACEHOLDERS:
- Select Insert Placeholders button and you will be routed to WordPress.
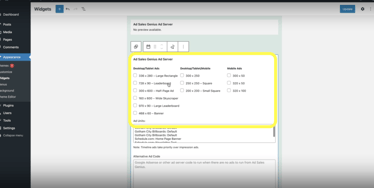
- Under Appearance select Widgets.
- To insert placeholders, select the + sign on the template and type in Ad Sales Genius Ad Server in the search bar.
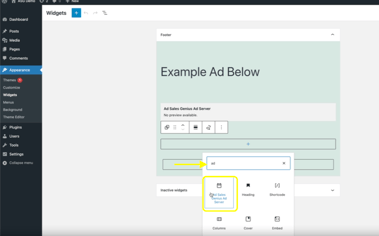
- Select which ad sizes you want to allow in the specific location.
- Next you will select the Ad Units. The Ads Unit list does auto-populate from ASG. If your list is empty there is a connectivity issue.
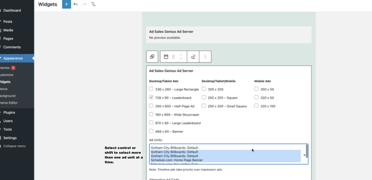
- Ad Units can be a timeline based product, CPM or a general run of site product. There is a priority based system for what is shown first. That order is:
-
- Timeline based products run first.
- CPM products run second. Based upon the contract settings, these products have the ability to run as fast as possible or run evenly.
- Alternative Ad Code run third. Drop in Google AdSense or other ad server code to run when there are no codes to run from ASG.
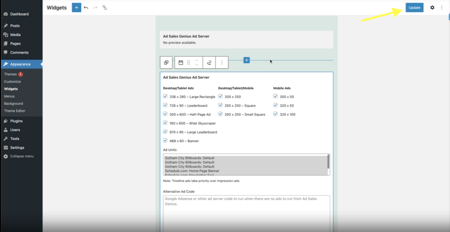
- Now, in the top right hand corner select Update and you are set!
All the ads are 100% ad proofer ad blocker proof.
BOOKING:
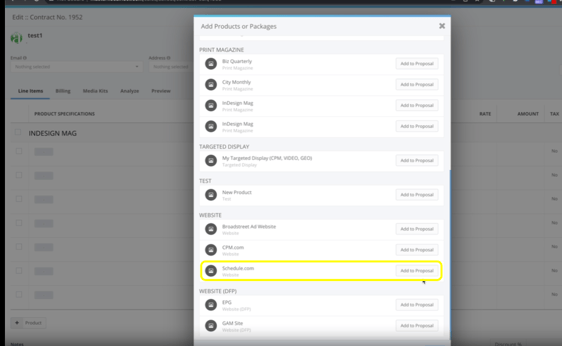
- Edit your contract and add your website product.
- Add your Unit/Size.
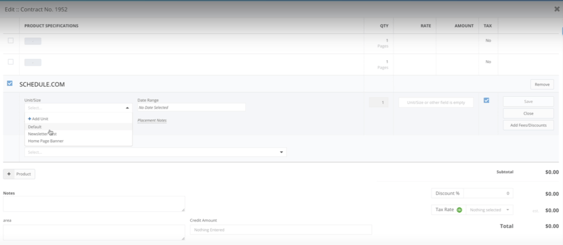
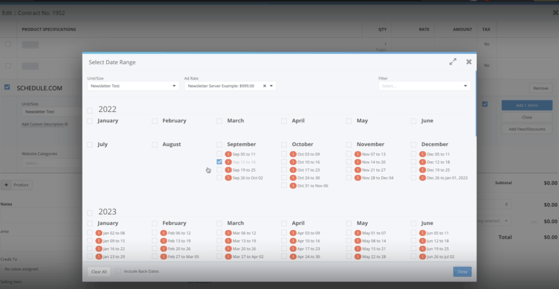
- Select your Data Range.
Then select your Website Categories. WordPress will be categorising different pages and/or different posts. You can dictate how those show by using website categories section. Leave blank if you do not want to target any categories. Selected categories will take priority over unselected categories.
- If Category 1 is selected, Category 1 and all subcategories below it will show (even when sub categories are not selected).
- Furthermore, when category 1 is NOT selected but a subcategory is selected, the selected subcategory and all the subcategory unselected beneath will show.
- Lastly, add your item to your contract.
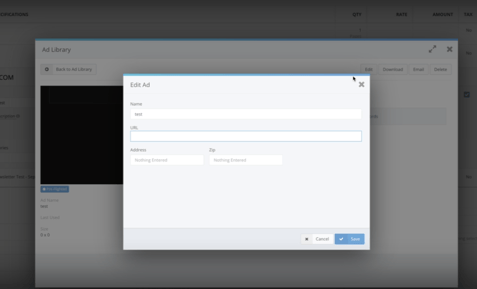
Please note: Be sure a URL is attached to the ad itself. Go to the Ad Library>find your ad>edit>